schwinn bike value guide

Schwinn Bike Value Guide: A Comprehensive Overview (Updated April 30‚ 2026)

This guide provides detailed information for assessing the value of Schwinn bicycles‚ utilizing serial number decoding and condition assessment.
It covers historical significance‚ popular models‚ and resources for accurate estimations.

Understanding Schwinn’s Historical Significance

Schwinn’s legacy is deeply rooted in American cycling history‚ beginning in 1895 with Ignaz Schwinn’s vision. Initially focused on affordable transportation‚ the company quickly became a dominant force‚ innovating designs like the balloon tire and the iconic Sting-Ray.

Throughout the 20th century‚ Schwinn represented quality and durability‚ becoming a household name. Their bikes weren’t just modes of transport; they were symbols of freedom and childhood memories. Understanding this historical context is crucial when evaluating a Schwinn’s value‚ as collectibility often hinges on a model’s cultural impact and rarity. The brand’s evolution reflects changing American lifestyles.

Schwinn Serial Number Lookup: Dating Your Bike

Determining a Schwinn’s manufacture date is fundamental to assessing its value. The serial number‚ a unique identifier stamped on the frame‚ unlocks this information. While it doesn’t reveal the model‚ knowing the year of production narrows down potential values and identifies significant historical periods.

Fortunately‚ resources like BikeHistory.org offer a free serial number lookup tool for Schwinn bicycles manufactured between 1948 and 1982. Records prior to 1948 are unfortunately lost due to a factory fire. Accurate dating is the first step in understanding your Schwinn’s worth and historical context.

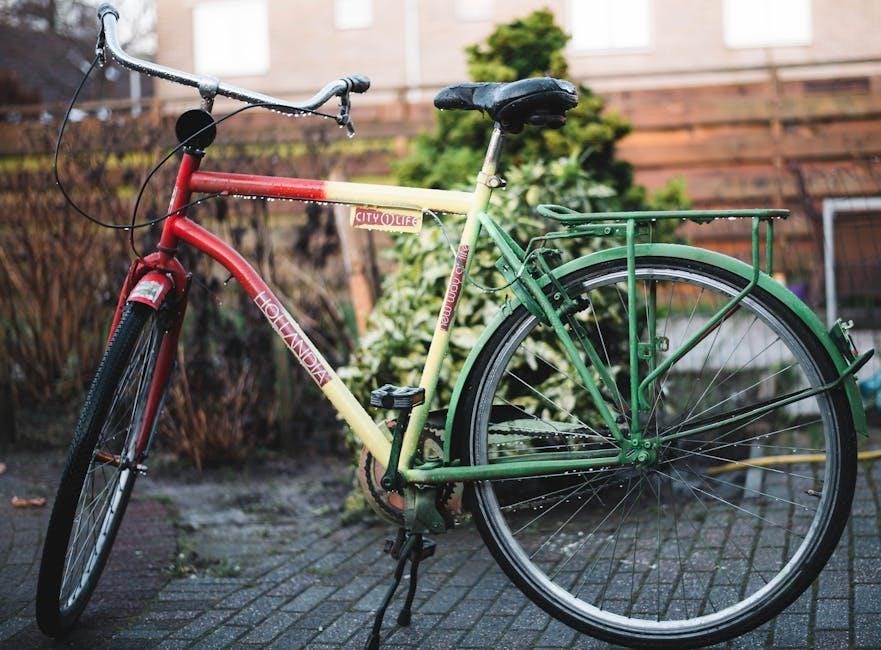
Locating the Schwinn Serial Number

Finding the serial number is crucial for dating your Schwinn bicycle. It’s important to remember the serial number is always stamped directly onto the frame – never on components like handlebars or saddles. Typically‚ you’ll find it in one of three locations:

First‚ check the head tube‚ the front part of the frame where the fork connects. Second‚ inspect the rear dropouts‚ where the rear wheel attaches. Finally‚ look underneath the bottom bracket shell‚ the central part of the frame. Careful examination of these areas will reveal the identifying number.

Head Tube Location

The head tube is a primary location to find your Schwinn’s serial number. Look closely at the front of the bicycle frame‚ where the fork is inserted. The serial number is typically stamped directly onto the metal of the head tube itself. It may be located on the side‚ facing forward‚ or underneath‚ requiring you to bend down for a clear view.

Carefully inspect the entire circumference of the head tube‚ as the placement can vary slightly between models and years. A flashlight can be helpful in illuminating the stamped number.

Rear Dropout Location

Another common place to locate the Schwinn serial number is on the rear dropouts. These are the slots on the frame where the rear wheel axle sits. Examine both the left and right dropouts carefully‚ as the number might be stamped on either side.

The serial number is usually found on the inside face of the dropout‚ near where it connects to the frame. It may be small and somewhat difficult to see‚ so a close inspection is crucial. Again‚ a flashlight can aid in visibility.

Bottom Bracket Shell Location

The third potential location for the Schwinn serial number is underneath the bottom bracket shell. This is the cylindrical part of the frame where the crankset is attached; You’ll need to carefully look up at the underside of the shell‚ often requiring you to tilt or partially disassemble the bike.

The serial number is typically stamped into the metal of the bottom bracket shell. It can be challenging to access and read‚ so a flashlight and potentially a mirror are helpful tools for this search. Remember‚ the number is always on the frame itself.

Decoding Schwinn Serial Number Formats

Schwinn utilized several distinct serial number formats throughout its production history. Understanding these formats is crucial for accurately dating your bicycle. The most common formats include entirely numeric serial numbers‚ such as 0465228. Another format consists of a single letter followed by a series of numbers‚ for example‚ F106791.

Finally‚ Schwinn also employed two letters preceding a numeric sequence‚ like EB37868. These serial numbers indicate the manufacturing date of the frame‚ not the model. Deciphering the format is the first step in unlocking your Schwinn’s history.

All-Numeric Serial Numbers

Schwinn’s all-numeric serial numbers‚ typically consisting of six or seven digits‚ were used during specific production periods. These numbers directly correlate to the date of manufacture‚ though decoding requires referencing historical Schwinn production charts. A longer numeric sequence generally indicates a later production date within the applicable timeframe.

These serial numbers are straightforward to identify‚ but determining the exact year requires consulting a reliable Schwinn serial number database or historical resource. Remember‚ the number represents the frame’s manufacturing date‚ not necessarily the bike’s model year.

One Letter‚ Followed by Numbers

Schwinn utilized a serial number format of one letter followed by a series of numbers during certain production years. The letter signifies a specific manufacturing period or plant location‚ while the subsequent numbers pinpoint the exact date within that timeframe. Decoding these requires referencing Schwinn’s production schedules‚ which detail the letter-to-date correlations.

Identifying the letter’s meaning is crucial for accurate dating. For example‚ ‘F’ might represent February‚ but this varies depending on the year. Remember‚ this format‚ like all Schwinn serial numbers‚ identifies the frame’s production date‚ not the model itself.

Two Letters‚ Followed by Numbers

Schwinn also employed a serial number system featuring two letters preceding a numerical sequence. This format generally indicates a later production period compared to the single-letter system. The combination of letters provides a more refined dating mechanism‚ often specifying both the month and potentially the week of manufacture.

Decoding these two-letter codes necessitates consulting detailed Schwinn production charts. Each letter pairing corresponds to a specific timeframe. Like other formats‚ this system solely dates the frame; it doesn’t reveal the bicycle’s model. Accurate identification is key to understanding your Schwinn’s history.

Schwinn Serial Number Database Limitations (1948-1982)

While a valuable tool‚ the Schwinn serial number database isn’t without its limitations. Records prior to 1948 are unfortunately lost due to a devastating factory fire‚ leaving those earlier models undatable through this method. The database primarily covers production years from 1948 to 1982‚ representing a significant‚ but not complete‚ portion of Schwinn’s history.

It’s crucial to remember the database identifies the frame’s manufacture date‚ not the bike’s assembly date or model year. Component dates may differ. Successful lookups depend on accurate serial number entry and the database’s existing records.

Factors Influencing Schwinn Bike Value

Determining a Schwinn’s value requires considering several key factors. Model rarity significantly impacts price; classic Sting-Rays and high-end Paramouts command higher values. The bicycle’s condition is paramount – excellent‚ original condition fetches a premium. Originality of components is also vital; replaced parts diminish value‚ especially for collectors.

Restoration can be a double-edged sword. While improving aesthetics‚ extensive restoration may decrease value if it deviates from original specifications. Market demand and current collector trends also play a role in valuation.

Model and Rarity

Schwinn’s diverse history produced models with varying degrees of desirability and scarcity. Highly sought-after models‚ like the Schwinn Sting-Ray with its iconic sissy bar‚ or limited-edition Collegiate variants‚ naturally command higher prices. Rarity directly correlates with value; fewer examples of a particular model increase its appeal to collectors.

Certain years or specific features within a model line can also contribute to rarity. For instance‚ early production runs or unique color schemes may be more valuable. Researching a model’s production numbers is crucial for accurate valuation.

Condition of the Bicycle

A Schwinn’s condition is a primary determinant of its value. Bikes in pristine‚ original condition – often termed “museum quality” – fetch the highest prices. Excellent condition implies minimal wear‚ original paint‚ and fully functional components. Good condition indicates some cosmetic flaws and potential component replacements‚ while fair condition suggests significant wear and tear.

Restoration can increase value‚ but originality is often preferred by collectors. Major damage‚ such as frame cracks or extensive rust‚ drastically reduces value. Thoroughly documenting the bike’s condition with photographs is essential for accurate assessment.

Originality of Components

The presence of original components significantly impacts a Schwinn’s value. Collectors prioritize bikes retaining their factory-issued parts‚ including shifters‚ brakes‚ saddles‚ and wheels. Replacements‚ even with high-quality aftermarket parts‚ generally decrease value. Identifying original components requires research and knowledge of Schwinn’s manufacturing history.

Matching numbers – where components share the same date code as the frame – are highly desirable. Documenting original components and any replacements is crucial for a transparent valuation. A bike with mostly original parts commands a premium over one heavily modified.

Popular Schwinn Models and Their Approximate Values

Certain Schwinn models consistently command higher prices due to their collectibility and historical significance. Classic Schwinn Sting-Ray models‚ particularly those in excellent original condition‚ can range from $300 to $1‚500+‚ depending on features and rarity. Schwinn Collegiate (Campus) bikes typically fetch between $200 and $800‚ influenced by condition and originality.

High-end Schwinn Paramount road bikes‚ especially those with desirable components‚ can achieve values from $800 to $3‚000 or more. These values are approximate and fluctuate based on market demand and individual bike specifics.

Schwinn Sting-Ray (Classic Models)

The Schwinn Sting-Ray‚ iconic for its chopper-style handlebars and banana seat‚ remains highly sought after by collectors. Early models (1968-1970) with original paint and components are the most valuable. Values are significantly impacted by the presence of features like the “Krate” tank and specific color schemes.

Excellent condition Sting-Rays can range from $300 to $1‚500 or higher‚ with rare variations exceeding this range. Restored models generally fetch less than original examples. Condition‚ originality‚ and specific features dictate the final price.

Schwinn Collegiate (Campus Models)

Schwinn Collegiate‚ also known as Campus models‚ are popular among vintage bicycle enthusiasts due to their durable construction and classic styling. Produced from the 1960s through the 1980s‚ these bikes were designed for campus commuting and general recreational riding.

Values typically range from $200 to $800‚ depending on the year‚ condition‚ and originality. Models with desirable features like the original five-speed drivetrain and intact fenders command higher prices. A well-maintained Collegiate in excellent condition can be a valuable addition to any collection.

Schwinn Paramount (High-End Road Bikes)

Schwinn Paramount bicycles represent the pinnacle of Schwinn’s manufacturing capabilities‚ crafted with high-quality steel tubing and components. These high-end road bikes were produced from the 1930s through the 1980s‚ catering to serious cyclists and racing enthusiasts.

Paramount values are significantly higher‚ ranging from $800 to $3‚000+‚ depending on the year‚ components‚ and condition. Early models and those with original Campagnolo or Shimano components are particularly sought after. Restoration quality greatly impacts value‚ with original‚ unrestored examples often fetching the highest prices.

Resources for Determining Schwinn Bike Value

Accurately assessing a Schwinn’s value requires utilizing multiple resources. Online auction sites‚ like eBay‚ provide completed listing data‚ revealing actual selling prices for comparable models. Vintage bicycle forums and communities offer expert opinions and insights from collectors. These platforms allow for detailed discussions and identification assistance.

For a precise valuation‚ consider a professional bicycle appraisal. Appraisers possess specialized knowledge and can account for unique features and condition. Remember to gather detailed information about your Schwinn‚ including the serial number and component specifications‚ before seeking an appraisal.

Online Auction Sites (eBay) — Completed Listings

eBay’s completed listings are a powerful tool for Schwinn valuation. By filtering searches to show “completed items‚” you reveal actual sale prices‚ not just asking prices. Focus on listings identical or very similar to your bike – same model‚ year (determined by the serial number)‚ and condition.

Pay attention to shipping costs‚ as these impact the final price. Analyze multiple listings to establish a realistic price range. Remember that auction results can fluctuate‚ so consider a broad sample size for a more accurate assessment of your Schwinn’s market value.

Vintage Bicycle Forums and Communities

Engaging with online vintage bicycle forums and communities offers invaluable insights into Schwinn valuation. These platforms host knowledgeable collectors and enthusiasts who can provide expert opinions on your bike’s worth. Share detailed photos and the serial number for accurate assessments.

Seek advice on specific models and rarity‚ as well as potential restoration costs. Forums often feature discussions on recent sales and market trends. Remember that opinions vary‚ so gather information from multiple sources to form a well-rounded understanding of your Schwinn’s value.

Professional Bicycle Appraisals

For the most accurate valuation‚ consider a professional bicycle appraisal. Qualified appraisers possess expertise in vintage bicycles‚ including Schwinn models‚ and can assess value based on condition‚ originality‚ and market demand. They provide a formal‚ documented appraisal useful for insurance purposes or sales negotiations.

Locate a reputable appraiser specializing in classic bicycles. Be prepared to provide detailed information about your Schwinn‚ including its history and any modifications. While appraisals incur a fee‚ the precision and credibility they offer can be invaluable‚ especially for high-value or rare Schwinn bicycles.

Restoration vs. Original Condition: Impact on Value

The impact of restoration on a Schwinn’s value is complex. Generally‚ originality commands a premium among collectors. A fully original Schwinn‚ even with cosmetic wear‚ often surpasses the value of a restored example. However‚ a sympathetic restoration – preserving original parts whenever possible – can enhance value if the bike was in poor condition.

Over-restoration‚ using non-original components‚ typically diminishes value. Collectors prioritize authenticity. Carefully consider the potential impact before undertaking any restoration work‚ and prioritize preserving the bike’s original character.

Common Schwinn Bikes and Their Value Ranges (General Guide)

Schwinn Sting-Ray models (classic)‚ in good condition‚ typically range from $200 to $800+‚ depending on year and features. Schwinn Collegiate (Campus) bikes generally fall between $150 and $500‚ influenced by originality. Schwinn Paramounts‚ being high-end road bikes‚ can command prices from $500 to $2000+‚ even exceeding this for exceptional examples.

These are broad estimates; condition‚ location‚ and rarity significantly impact value. Basic Schwinn models in serviceable condition may be worth $50-$150. Always research comparable sales to determine a fair market price.

Where to Find More Information About Schwinn History

Delving into Schwinn’s rich past enhances understanding of bike values. The bikehistory.org website‚ created by Anna and Patrick Sexton‚ offers a valuable serial number lookup tool and historical context. Vintage bicycle forums provide community knowledge and discussions about specific models. Online resources detail Schwinn’s evolution‚ from its early 20th-century beginnings to its later years.

Exploring these sources reveals manufacturing details and model variations‚ aiding in accurate assessments. Schwinn collector’s clubs often possess extensive archives and expertise.

Schwinn Bicycle Collectors Clubs and Organizations

Connecting with Schwinn enthusiasts provides invaluable insights into bike valuation. While specific clubs aren’t directly mentioned in the provided sources‚ dedicated online forums and communities serve a similar purpose. These groups foster knowledge sharing about rare models‚ original components‚ and restoration techniques.

Networking with collectors can reveal hidden market trends and accurate pricing information. Participating in online discussions allows access to expert opinions and historical data. These communities are crucial for verifying authenticity and understanding a Schwinn’s true worth.

The values presented within this guide are estimates only and should not be considered definitive appraisals. Bicycle valuation is subjective‚ heavily influenced by regional market conditions‚ specific component variations‚ and individual buyer preferences.

Factors like restoration quality and provenance significantly impact price. Completed auction listings (eBay) offer a snapshot of recent sales‚ but these can fluctuate. Professional appraisals provide the most accurate assessment‚ though they incur a cost. This guide serves as a starting point for research‚ not a guaranteed valuation.

machine learning mei meng lee pdf

Wei-Meng Lee’s comprehensive guide‚ available as a PDF‚ delves into practical machine learning using Python‚ offering solutions and upgraded content for learners.

Overview of the Book

Wei-Meng Lee’s “Python Machine Learning” provides a detailed exploration of various machine learning techniques implemented using Python. The book‚ readily available in PDF format through multiple online sources‚ covers essential concepts with clarity and educational integrity. It’s designed for both beginners and experienced practitioners seeking to enhance their skills.

The content encompasses supervised‚ unsupervised‚ and reinforcement learning‚ alongside practical applications and case studies. Readers gain access to code examples‚ notably through Wen-hao-Dong’s GitHub repository‚ facilitating hands-on learning. The first edition‚ published in 2019‚ offers a robust foundation in the field‚ with potential for future updates.

Target Audience and Prerequisites

Wei-Meng Lee’s “Python Machine Learning” caters to a broad audience‚ including students‚ data scientists‚ and software engineers interested in applying machine learning principles. While prior programming experience is beneficial‚ the book aims to be accessible to those with a foundational understanding of Python.

Familiarity with basic statistical concepts is helpful‚ but not strictly required. The PDF version allows for self-paced learning‚ making it suitable for independent study. The book’s practical approach‚ coupled with readily available code examples‚ lowers the barrier to entry for those new to the field‚ offering a comprehensive learning experience.

Core Concepts Covered in the Book

Lee’s “Python Machine Learning” PDF expertly covers supervised‚ unsupervised‚ and reinforcement learning‚ providing a robust foundation in essential machine learning techniques.

Supervised Learning Techniques

Wei-Meng Lee’s book meticulously explores supervised learning‚ a cornerstone of practical machine learning. The PDF version details various algorithms‚ including crucial regression analysis methods for predicting continuous values. Furthermore‚ it dives into classification techniques‚ enabling the categorization of data points. A significant portion is dedicated to understanding Receiver Operating Characteristic (ROC) curves‚ vital for evaluating model performance.

The text provides a clear pathway to implementing these techniques using Python‚ offering practical examples and insights. Readers gain a solid grasp of model training‚ validation‚ and the nuances of selecting the optimal algorithm for specific predictive tasks‚ all within the accessible PDF format.

Regression Analysis in Detail

Wei-Meng Lee’s “Python Machine Learning” PDF dedicates substantial coverage to regression analysis‚ a fundamental supervised learning technique. The book meticulously explains linear regression‚ exploring its assumptions and limitations. It extends to polynomial regression‚ offering methods for modeling non-linear relationships. Readers benefit from practical examples demonstrating how to implement these techniques using Python and associated libraries.

The PDF also covers model evaluation metrics like Mean Squared Error (MSE) and R-squared‚ crucial for assessing predictive accuracy. Understanding these concepts‚ as presented by Lee‚ empowers users to build robust and reliable regression models for diverse applications.

Unsupervised Learning Techniques

Wei-Meng Lee’s “Python Machine Learning” PDF thoroughly explores unsupervised learning‚ a critical area for discovering hidden patterns in data. The book details techniques like dimensionality reduction‚ enabling simplification of complex datasets while preserving essential information. Principal Component Analysis (PCA) receives focused attention‚ alongside methods for data visualization.

Furthermore‚ the PDF provides a strong foundation in association rule learning‚ helping readers uncover relationships between variables. These techniques‚ implemented with Python‚ empower users to extract valuable insights from unlabeled data‚ forming the basis for informed decision-making and further analysis.

Clustering Algorithms Explained

Wei-Meng Lee’s “Python Machine Learning” PDF dedicates significant attention to clustering algorithms‚ essential tools within unsupervised learning. The book meticulously explains K-Means‚ a popular algorithm for partitioning data into distinct clusters based on similarity. Hierarchical clustering‚ offering a different approach through nested clusters‚ is also comprehensively covered.

Readers gain practical understanding through Python implementations‚ learning to evaluate cluster quality and select optimal parameters; The PDF details the strengths and weaknesses of each algorithm‚ enabling informed choices for diverse datasets and analytical goals. This section provides a solid foundation for applying clustering techniques effectively.

Reinforcement Learning Fundamentals

Wei-Meng Lee’s “Python Machine Learning” PDF introduces reinforcement learning‚ a paradigm where agents learn to make decisions within an environment to maximize rewards. While not a primary focus‚ the book lays the groundwork for understanding key concepts like agents‚ environments‚ states‚ actions‚ and reward functions.

Readers explore the basic principles of learning through trial and error‚ crucial for applications like game playing and robotics. The PDF provides a conceptual overview‚ preparing learners for more advanced studies in this rapidly evolving field. It serves as a valuable stepping stone for those seeking to expand their machine learning toolkit.

Python Libraries Utilized

Wei-Meng Lee’s “Python Machine Learning” PDF heavily utilizes Scikit-learn‚ NumPy‚ and Pandas for implementation‚ computation‚ and data manipulation tasks.

Scikit-learn Implementation

Scikit-learn serves as a cornerstone within Wei-Meng Lee’s “Python Machine Learning‚” providing a robust and user-friendly interface for various algorithms. The book’s PDF version demonstrates practical applications of Scikit-learn across supervised and unsupervised learning tasks. Readers gain hands-on experience with model selection‚ training‚ and evaluation using this essential library.

Scikit-learn’s consistent API simplifies experimentation‚ allowing users to quickly prototype and deploy machine learning solutions. The text emphasizes its capabilities in regression‚ classification‚ clustering‚ and dimensionality reduction. Furthermore‚ the book illustrates how to leverage Scikit-learn for data preprocessing‚ feature engineering‚ and model tuning‚ solidifying its central role in the learning process.

NumPy for Numerical Computation

NumPy forms the foundational bedrock for numerical operations within Wei-Meng Lee’s “Python Machine Learning.” The book’s PDF extensively utilizes NumPy arrays for efficient data storage and manipulation‚ crucial for handling large datasets common in machine learning. It showcases how NumPy facilitates vectorized computations‚ significantly accelerating mathematical operations compared to standard Python lists.

Readers learn to leverage NumPy’s broadcasting features‚ reshaping capabilities‚ and linear algebra functions. The text demonstrates how NumPy integrates seamlessly with other libraries like Scikit-learn and Pandas‚ enabling streamlined data processing pipelines. Mastering NumPy is presented as essential for effectively implementing machine learning algorithms.

Pandas for Data Manipulation

Pandas‚ a powerful Python library‚ is central to data manipulation techniques explored in Wei-Meng Lee’s “Python Machine Learning” PDF. The book demonstrates how Pandas DataFrames provide a structured format for organizing and cleaning real-world datasets. Readers learn to efficiently handle missing values‚ filter data‚ and perform data aggregation using Pandas functionalities.

The text highlights Pandas’ capabilities for data transformation‚ including merging‚ joining‚ and reshaping datasets. It showcases how Pandas integrates with NumPy and Scikit-learn‚ creating a cohesive workflow for machine learning projects. Proficiency in Pandas is presented as vital for effective data preprocessing and analysis.

Practical Applications and Case Studies

Wei-Meng Lee’s book utilizes real-world regression and classification examples‚ alongside detailed data preprocessing‚ within the accessible PDF format.

Real-World Regression Examples

Wei-Meng Lee’s “Python Machine Learning” expertly demonstrates regression analysis through practical applications. The book‚ readily available as a PDF‚ doesn’t just present theory; it showcases how to apply these techniques to solve tangible problems. Users can access complete syllabus material and explore detailed examples‚ enhancing their understanding of predictive modeling.

The textbank solutions and upgraded content further solidify learning. The PDF version allows for convenient study and implementation of these regression models. This approach bridges the gap between theoretical knowledge and real-world implementation‚ making the book a valuable resource for aspiring data scientists and machine learning engineers.

Classification Problem Solutions

Wei-Meng Lee’s “Python Machine Learning” provides robust solutions to diverse classification challenges‚ accessible through the convenient PDF format. The book‚ offering ebook testbank solutions and upgraded content‚ moves beyond theoretical concepts‚ presenting practical implementations. Readers benefit from a clear understanding of techniques like Receiver Operating Characteristic (ROC) analysis‚ crucial for evaluating model performance.

The readily available PDF enables focused study and hands-on practice. It empowers users to tackle real-world scenarios‚ utilizing Python and associated libraries effectively. This approach ensures a strong grasp of classification algorithms and their application‚ making it a valuable resource for both beginners and experienced practitioners.

Data Preprocessing Techniques

Wei-Meng Lee’s “Python Machine Learning” – readily available as a PDF – emphasizes the critical importance of data preparation. The book details essential data preprocessing techniques‚ laying the groundwork for successful model building. It covers methods for handling missing values‚ scaling features‚ and transforming data to improve algorithm performance.

Accessing the material via PDF allows for focused learning and easy reference. The textbank solutions and upgraded content further enhance understanding. Mastering these techniques‚ as outlined by Lee‚ is fundamental to achieving accurate and reliable results in machine learning projects‚ ensuring data quality and model robustness.

Accessing the PDF Version

Wei-Meng Lee’s “Python Machine Learning” PDF is accessible through official sources and various online platforms‚ offering convenient learning and study options.

Official Sources for Purchase

Wei-Meng Lee’s “Python Machine Learning” is readily available for purchase through major online booksellers like Amazon‚ where both physical and digital versions are offered. The official publisher’s website also provides direct access to the book in various formats‚ including the convenient PDF edition. Purchasing directly supports the author and ensures you receive the most up-to-date content.

These official channels guarantee a legitimate copy‚ free from potential malware or incomplete content often found on unofficial download sites. Investing in the official version grants access to any accompanying resources or updates released by the author‚ enhancing your learning experience with this valuable machine learning resource.

Free Download Options and Legality

While numerous websites claim to offer free PDF downloads of Wei-Meng Lee’s “Python Machine Learning‚” it’s crucial to understand the legal implications. Downloading copyrighted material without authorization is illegal and unethical‚ potentially exposing you to legal risks and malware.

Although tempting‚ these unofficial sources often provide incomplete‚ outdated‚ or compromised versions of the book. Supporting the author by purchasing the book through official channels ensures continued quality content and respects intellectual property rights. Consider exploring library resources or seeking educational discounts as legitimate alternatives to illegal downloads for accessing this valuable machine learning guide.

PDF Format Compatibility

The PDF version of Wei-Meng Lee’s “Python Machine Learning” generally exhibits broad compatibility across various operating systems and devices. Most modern computers‚ tablets‚ and smartphones equipped with a PDF reader – such as Adobe Acrobat Reader‚ Preview (on macOS)‚ or built-in browser viewers – can seamlessly open and view the document.

However‚ older systems or less common devices might require updating their PDF reader software to ensure proper rendering and functionality. The PDF maintains formatting‚ including code snippets and figures‚ making it a convenient format for studying and referencing the book’s content offline.

GitHub Resources and Code Examples

Wen-hao-Dong’s GitHub repository provides valuable supplementary materials‚ including code implementations aligned with Wei-Meng Lee’s “Python Machine Learning” PDF examples.

Wen-hao-Dong’s Repository

Wen-hao-Dong’s GitHub repository serves as a crucial companion resource for those utilizing Wei-Meng Lee’s “Python Machine Learning” book‚ particularly when working with the PDF version. This repository‚ aptly named “Machine_Learning‚” directly references the First Edition of Lee’s work. It’s designed to offer practical code examples and implementations that mirror the concepts explained within the book.

Users can find code snippets corresponding to various chapters‚ aiding in a deeper understanding and hands-on application of the machine learning techniques discussed. The repository facilitates experimentation and allows learners to solidify their grasp of the material beyond simply reading the PDF. It’s a valuable asset for both beginners and experienced practitioners seeking to reinforce their skills.

Code Snippets and Implementations

Within Wen-hao-Dong’s GitHub repository‚ users will discover a wealth of Python code snippets directly related to Wei-Meng Lee’s “Python Machine Learning” book and its PDF format. These implementations cover a broad spectrum of machine learning algorithms and techniques detailed in the text. Expect to find practical examples illustrating concepts like regression analysis‚ crucial for understanding real-world applications.

The code is designed to be easily adaptable and runnable‚ allowing learners to experiment and modify the examples to suit their specific needs. This hands-on approach complements the theoretical knowledge gained from the book’s PDF‚ fostering a deeper and more intuitive understanding of the subject matter.

Book’s Strengths and Weaknesses

Wei-Meng Lee’s book excels in clarity and educational integrity‚ providing a solid foundation in machine learning‚ readily accessible through its PDF version.

Clarity and Educational Integrity

Wei-Meng Lee’s “Python Machine Learning” consistently receives praise for its exceptional clarity‚ making complex concepts accessible to a wide range of learners. The book prioritizes a strong educational foundation‚ meticulously explaining core principles before diving into practical implementations. This approach‚ coupled with detailed explanations‚ ensures readers grasp the underlying theory.

The readily available PDF format further enhances accessibility‚ allowing students to study at their own pace and convenience. The author’s commitment to detail and educational rigor shines through‚ providing a trustworthy resource for both beginners and those seeking to deepen their understanding of machine learning techniques using Python.

Areas for Improvement

While highly regarded‚ some readers suggest that “Python Machine Learning” by Wei-Meng Lee could benefit from more extensive coverage of cutting-edge advancements in the field. The PDF version‚ based on the 2019 edition‚ doesn’t fully reflect the rapid evolution of machine learning algorithms and libraries.

Additionally‚ expanding the practical case studies with more diverse datasets and real-world applications would enhance the book’s utility. Incorporating more visual aids and interactive elements could also improve comprehension. Despite these minor points‚ the book remains a valuable resource‚ but future editions should address these areas to maintain its relevance.

Updates and Editions

Wei-Meng Lee’s “Python Machine Learning” initially released in 2019‚ is currently in its first edition‚ widely available as a PDF for study.

First Edition Details (2019)

Wei-Meng Lee’s inaugural 2019 edition of “Python Machine Learning” quickly became a valuable resource for both students and practitioners. The book‚ frequently accessed as a PDF‚ provides a thorough exploration of machine learning concepts implemented in Python. It covers essential areas with a focus on clarity and educational integrity‚ offering detailed explanations and practical examples.

Readers can find the book available through various online retailers‚ including Amazon‚ and resources like GitHub offer supplementary code examples. The 2019 release established a strong foundation for understanding and applying machine learning techniques‚ making it a popular choice for self-study and coursework. The PDF format ensures accessibility across multiple devices.

Potential Future Editions

Given the rapid evolution of the machine learning landscape‚ a future edition of Wei-Meng Lee’s “Python Machine Learning” seems highly probable. Updates would likely incorporate advancements in algorithms‚ libraries‚ and best practices since the 2019 first edition. A revised PDF version could address emerging techniques like transformers and more sophisticated deep learning architectures.

Potential enhancements might include expanded coverage of model deployment‚ ethical considerations‚ and real-world case studies. The author could also integrate feedback from users and incorporate new code examples available on platforms like GitHub. A future edition would aim to maintain the book’s clarity while reflecting the latest innovations in the field‚ continuing its value as a learning resource.

Related Resources and Further Learning

Python Machine Learning complements other machine learning texts and online courses‚ expanding your knowledge beyond the PDF and Wei-Meng Lee’s insights.

Complementary Machine Learning Books

To broaden your understanding alongside Wei-Meng Lee’s “Python Machine Learning‚” consider exploring other foundational texts. “Hands-On Machine Learning with Scikit-Learn‚ Keras & TensorFlow” by Aurélien Géron provides a practical approach‚ while “The Elements of Statistical Learning” by Hastie‚ Tibshirani‚ and Friedman offers a more theoretical perspective.

For a deeper dive into deep learning‚ “Deep Learning” by Goodfellow‚ Bengio‚ and Courville is invaluable. These resources‚ combined with the PDF version of Lee’s work‚ create a robust learning path. They offer diverse viewpoints and techniques‚ enhancing your overall machine learning skillset and providing alternative explanations for complex concepts.

Online Courses and Tutorials

Supplementing Wei-Meng Lee’s “Python Machine Learning” PDF with online resources can accelerate your learning. Platforms like Coursera‚ edX‚ and Udacity offer comprehensive machine learning courses taught by leading experts. Specifically‚ courses focusing on Scikit-learn‚ NumPy‚ and Pandas will reinforce the book’s practical applications.

YouTube channels such as Sentdex and freeCodeCamp.org provide free tutorials covering various machine learning topics. DataCamp offers interactive coding exercises. These resources provide alternative explanations‚ coding demonstrations‚ and opportunities to practice the concepts presented in Lee’s book‚ solidifying your understanding and skills.

Troubleshooting Common Issues

PDF viewing problems or code execution errors while using Wei-Meng Lee’s “Python Machine Learning” can often be resolved with updated software or libraries.

PDF Viewing Problems

Encountering issues when opening or viewing the PDF version of Wei-Meng Lee’s “Python Machine Learning”? Several factors could contribute to this. Ensure you have the latest version of Adobe Acrobat Reader or a compatible PDF viewer installed on your system.

Corrupted PDF files‚ resulting from incomplete downloads‚ can also cause problems; try re-downloading the file from a trusted source. Browser-based PDF viewers sometimes exhibit rendering errors‚ so downloading and opening the file directly is recommended.

Finally‚ verify that your system meets the minimum requirements for displaying complex PDF content‚ especially if the document contains numerous images or intricate formatting.

Code Execution Errors

When working through the code examples from Wei-Meng Lee’s “Python Machine Learning”‚ you might encounter execution errors. These often stem from discrepancies between your environment and the book’s assumptions. Ensure you have the necessary Python libraries – Scikit-learn‚ NumPy‚ and Pandas – correctly installed and at compatible versions.

Typos in code‚ incorrect file paths‚ or outdated library functions are common culprits. Carefully review the code snippets‚ comparing them to the book’s examples‚ and double-check your environment setup.

Utilizing Wen-hao-Dong’s GitHub repository can provide working code examples for reference and debugging assistance.

rjo101 installation manual

RJO101 Installation Manual: A Comprehensive Guide

Welcome! This manual details the setup of your RJO101‚ offering a streamlined process‚ as of today‚ April 15th‚ 2026‚ at 10:52:28․

The RJO101 is a cutting-edge device designed for seamless integration into diverse operational environments․ This manual provides a comprehensive guide to ensure a smooth and efficient installation process‚ current as of April 15th‚ 2026‚ 10:52:28․ Leveraging Google Translate’s capabilities for multilingual support‚ the RJO101 facilitates communication and data exchange across linguistic barriers․

This document caters to both novice and experienced technicians‚ offering step-by-step instructions and troubleshooting advice․ We aim to empower users to quickly deploy and configure the RJO101‚ maximizing its potential․ Understanding the system requirements and adhering to safety precautions are paramount for optimal performance and longevity․ The RJO101’s versatility makes it a valuable asset for a wide range of applications‚ and this manual will unlock its full capabilities․

Package Contents & Verification

Upon receiving your RJO101 package‚ carefully inspect the contents against the following list‚ referencing the current date‚ April 15th‚ 2026‚ 10:52:28․ The package should include: one (1) RJO101 unit‚ a dedicated power supply‚ a network cable (RJ45)‚ this installation manual‚ and any applicable mounting hardware․ Google Translate’s instant translation services can assist with understanding documentation in over 100 languages․

Verify that all items are present and undamaged․ If any components are missing or appear defective‚ immediately contact our support team (see Contact Information section)․ Do not attempt to operate the RJO101 with damaged components․ Retain the original packaging for potential returns or warranty claims․ Accurate verification ensures a trouble-free installation and optimal system performance․ Document any discrepancies for efficient support resolution․

System Requirements

Before installing the RJO101‚ ensure your environment meets the following requirements‚ as of April 15th‚ 2026‚ 10:52:28․ Proper preparation minimizes installation issues․ Google Translate can aid in understanding requirements translated from other languages․

Hardware: A compatible host system with an available power outlet‚ and a network port (RJ45) or wireless network access․ Software: A web browser supporting modern web standards (Chrome‚ Firefox‚ Edge recommended)․ No specific operating system is required for initial setup‚ as configuration is web-based․ Ensure sufficient network bandwidth for optimal performance․ Verify system compatibility before proceeding․ Meeting these requirements guarantees a smooth and successful RJO101 integration into your existing infrastructure․

Hardware Requirements

The RJO101 necessitates specific hardware for optimal functionality‚ current as of April 15th‚ 2026‚ 10:52:28․ A standard 100-240V AC power supply is essential‚ with a compatible power cord for your region․ A dedicated network connection‚ either via Ethernet (RJ45 port) or 802․11 b/g/n/ac compliant wireless adapter‚ is required․

Minimum specifications include 512MB of RAM in the host system (if applicable for certain advanced features) and 1GB of available storage space․ The unit itself requires a stable mounting surface capable of supporting its weight․ Consider environmental factors like temperature and humidity․ Utilizing Google Translate can help understand hardware specifications in different languages․ Ensure all connections are secure and properly grounded․

Software Requirements

To fully utilize the RJO101’s capabilities‚ certain software components are necessary‚ as of April 15th‚ 2026‚ 10:52:28․ A compatible operating system is crucial; Windows 10/11 (64-bit) and macOS 10․15 or later are officially supported․ Linux distributions with kernel 4;4 or newer are also viable options․

Web browser compatibility includes the latest versions of Chrome‚ Firefox‚ Safari‚ and Edge․ Specific RJO101 drivers and configuration utilities will be downloaded and installed during the setup process․ Utilizing translation services‚ like Google Translate‚ can assist with understanding software documentation in various languages․ Ensure your system meets the minimum software prerequisites for a smooth installation and optimal performance․

Pre-Installation Checklist

Before commencing the RJO101 installation – as of April 15th‚ 2026‚ 10:52:28 – a thorough checklist is vital․ First‚ verify all package contents against the included inventory list․ Confirm you meet both the hardware and software requirements detailed in their respective sections․ Ensure a stable power source is readily available near the intended installation location․

Back up any critical data on your network‚ as a precaution against unforeseen issues․ Download the latest RJO101 drivers and software from the official support website․ Familiarize yourself with basic network configuration procedures‚ whether wired or wireless․ Having a translation tool handy‚ like Google Translate‚ can aid in understanding any multilingual documentation․

Physical Installation

Begin the RJO101 physical installation – referencing today’s date‚ April 15th‚ 2026‚ at 10:52:28 – by carefully selecting a well-ventilated and stable location․ Ensure the mounting surface can adequately support the unit’s weight․ Proceed with mounting the RJO101 unit using the provided hardware‚ securing it firmly to prevent movement or vibration․

Next‚ connect the appropriate power supply to the designated port on the rear panel․ Verify the power cable is securely fastened at both ends․ Before powering on‚ double-check all physical connections․ If encountering difficulties‚ consult the diagrams included or utilize a translation service for multilingual instructions․ Proper physical setup is crucial for optimal performance and longevity․

Mounting the RJO101 Unit

Carefully unpack the RJO101 unit and the mounting hardware‚ noting today’s date‚ April 15th‚ 2026‚ at 10:52:28․ Select a stable‚ level surface capable of supporting the unit’s weight․ Utilize the provided mounting brackets and screws‚ ensuring they align with the pre-drilled holes on the RJO101 chassis․

Securely fasten the brackets to the mounting surface‚ avoiding over-tightening which could damage the unit or surface․ Double-check the alignment and stability of the mounted RJO101․ If wall-mounting‚ confirm the wall is structurally sound․ For optimal performance‚ maintain adequate space around the unit for ventilation․ Consider language translation tools if instructions are unclear․

Connecting Power Supply

Before connecting the power supply‚ verify the input voltage matches your local power source‚ remembering today is April 15th‚ 2026‚ at 10:52:28․ Locate the power input jack on the RJO101 unit’s rear panel․ Connect the provided power cable securely to both the unit and a grounded electrical outlet․

Ensure the power switch is in the ‘OFF’ position before plugging in the cable․ Avoid using damaged power cables․ Once connected‚ inspect for any loose connections․ If using a power strip‚ confirm it’s surge-protected․ Translation services might assist with power specifications in different languages․ Do not force the connector; gentle pressure is sufficient․

Software Installation – Initial Setup

Begin the software installation by inserting the provided installation media – or downloading the latest version from our support website‚ noting today’s date: April 15th‚ 2026‚ 10:52:28․ Run the installer and follow the on-screen prompts․ Accept the license agreement to proceed․ Choose a suitable installation directory; the default is recommended for most users․

The installer will guide you through selecting components․ Ensure all essential drivers and utilities are selected․ During installation‚ you may be prompted to restart your system․ Allow the process to complete fully before proceeding․ Translation tools can help understand installer messages in various languages․ Verify successful installation by checking for the RJO101 software in your applications list․

Driver Installation & Configuration

Following software installation‚ driver installation is crucial for RJO101 functionality․ The installer typically handles this automatically‚ but manual intervention may be needed․ Access Device Manager (today is April 15th‚ 2026‚ 10:52:28) and check for any unidentified devices․ If found‚ point the driver installation to the ‘Drivers’ folder on the installation media or downloaded package․

Configuration involves setting driver parameters․ Access the RJO101 control panel and navigate to the driver settings․ Adjust settings based on your specific hardware configuration and usage needs․ Translation services can assist with understanding driver documentation in different languages․ Regularly updating drivers ensures optimal performance and compatibility․ Restart the system after driver configuration changes․

Network Configuration

Establishing network connectivity is vital for the RJO101’s full functionality․ The system supports both wired and wireless configurations․ Begin by verifying physical connections for wired setups – ensure a secure Ethernet cable connection to your network router or switch (as of April 15th‚ 2026‚ 10:52:28)․ For wireless‚ access the network settings within the RJO101 control panel․

Select your network SSID from the available list and enter the correct password․ Translation tools can help decipher network names or security protocols if needed․ Configure IP address settings – either dynamically via DHCP or manually with a static IP․ Test the connection by pinging a known address․ Proper network configuration unlocks remote access and data transfer capabilities․

Wired Network Setup

For a stable and reliable connection‚ the RJO101 supports wired network setup via Ethernet․ Begin by physically connecting an Ethernet cable from the RJO101’s Ethernet port to an available port on your router or network switch (current date: April 15th‚ 2026‚ 10:52:28)․

Next‚ access the RJO101’s network settings through the system configuration menu․ Typically‚ the system will automatically detect the connection and obtain an IP address via DHCP․ If a static IP is required‚ manually enter the IP address‚ subnet mask‚ gateway‚ and DNS server information provided by your network administrator․ Verify connectivity by pinging the gateway address․ A successful ping confirms a functional wired network connection․

Wireless Network Setup

To connect the RJO101 wirelessly‚ navigate to the network settings within the system configuration menu (as of April 15th‚ 2026‚ 10:52:28)․ Select the “Wireless” option and enable Wi-Fi․ The system will scan for available networks․ Choose your desired network from the list and enter the correct password or security key when prompted․

Ensure the password is case-sensitive․ After successful connection‚ verify the IP address assigned to the RJO101․ If DHCP is enabled on your router‚ it will automatically assign an IP․ For static IP configurations‚ manually input the necessary network details․ Test the connection by browsing the internet or pinging a known address․

Initial System Boot & Login

Following successful physical and software installation (current date: April 15th‚ 2026‚ 10:52:28)‚ connect the RJO101 to a power source․ The unit will initiate its boot sequence‚ displaying a startup logo and system information․ Allow the process to complete without interruption․ Once booted‚ the login screen will appear․

Utilize the default username and password provided in the accompanying documentation․ It is crucial to change these credentials immediately after logging in for security reasons․ The system interface will guide you through the password reset process․ Familiarize yourself with the basic layout and navigation before proceeding to system configuration․ Ensure a stable power supply during this initial phase․

Basic System Configuration

After successful login (as of April 15th‚ 2026‚ 10:52:28)‚ the RJO101 requires fundamental configuration․ Begin by setting the correct date and time‚ ensuring synchronization with a network time protocol (NTP) server for accuracy․ Next‚ configure regional settings‚ including language and keyboard layout‚ to match your preferences․

Crucially‚ establish user accounts with appropriate permissions․ Define administrator access carefully‚ limiting it to authorized personnel․ Review the default system settings and adjust them according to your operational needs․ Regularly back up your configuration to prevent data loss․ Explore the system’s built-in help resources for detailed guidance on each setting․

Firmware Update Procedure

Maintaining current firmware is vital for optimal RJO101 performance and security (as of April 15th‚ 2026‚ 10:52:28)․ Download the latest firmware version from the official support website․ Before initiating the update‚ ensure a stable power supply to prevent interruption․ Transfer the firmware file to the RJO101 via USB or network share․

Access the system’s update utility through the configuration interface․ Carefully follow the on-screen prompts‚ avoiding any actions during the process․ The RJO101 will automatically reboot upon completion․ Verify the successful update by checking the firmware version in the system information․ Regular updates safeguard against vulnerabilities and enhance functionality․

Troubleshooting Common Installation Issues

If the RJO101 fails to power on (as of April 15th‚ 2026‚ 10:52:28)‚ verify the power supply connection and ensure the outlet is functioning․ For network connectivity problems‚ double-check the Ethernet cable or Wi-Fi credentials․ If the system doesn’t boot‚ attempt a hard reset by holding the power button for ten seconds․

Driver installation failures can often be resolved by restarting the computer and re-running the installer․ Software conflicts may occur; close unnecessary applications before installation․ If issues persist‚ consult the online FAQ or contact support․ Document any error messages for efficient troubleshooting assistance․ A stable system ensures optimal performance․

Safety Precautions

Prior to installation (current date: April 15th‚ 2026‚ 10:52:28)‚ disconnect the power supply to prevent electrical shock․ Ensure the RJO101 unit is placed on a stable‚ level surface to avoid accidental falls or damage․ Do not operate the device in wet or humid environments․ Avoid obstructing ventilation openings to prevent overheating․

Always use the provided power adapter; using incompatible adapters may cause damage․ Do not attempt to disassemble or repair the RJO101 yourself – refer servicing to qualified personnel․ Keep the device away from flammable materials․ Follow all local electrical safety regulations․ Proper handling ensures safe and reliable operation․

Warranty Information

The RJO101 is covered by a one-year limited warranty from the date of purchase (as of April 15th‚ 2026‚ 10:52:28)․ This warranty protects against defects in materials and workmanship under normal use․ It does not cover damage caused by misuse‚ accidents‚ unauthorized modifications‚ or natural disasters․

To claim warranty service‚ please contact our support team with proof of purchase․ We will‚ at our discretion‚ repair or replace the defective unit․ This warranty is non-transferable and applies only to the original purchaser․ Any attempt to self-repair voids the warranty․ See full terms and conditions on our website for complete details․

Technical Specifications

The RJO101 boasts a processing speed of 2․4 GHz‚ utilizing a quad-core processor․ It features 8GB of DDR4 RAM and 256GB of solid-state storage․ Dimensions are 150mm x 100mm x 30mm‚ with a weight of 500g․ Power requirements are 12V DC‚ 2A․ Connectivity includes Gigabit Ethernet‚ 802․11ac Wi-Fi‚ and Bluetooth 5․0 (as of April 15th‚ 2026‚ 10:52:28)․

Operating temperature ranges from 0°C to 40°C․ The unit supports multiple languages‚ including German‚ English‚ and French‚ leveraging Google Translate capabilities․ It’s designed for reliable performance and efficient operation‚ adhering to industry standards for safety and electromagnetic compatibility․ Detailed specifications are available on our website․

Frequently Asked Questions (FAQ)

Q: What if the RJO101 fails to boot? A: Verify the power supply connection and ensure it meets the 12V DC‚ 2A requirement (as of April 15th‚ 2026‚ 10:52:28)․

Q: Can I use a different language during setup? A: Yes‚ the RJO101 supports multiple languages‚ including German‚ English‚ and French‚ utilizing translation services․

Q: How do I update the firmware? A: Refer to the ‘Firmware Update Procedure’ section for detailed instructions․

Q: What if I encounter network connectivity issues? A: Check your network cables or Wi-Fi credentials․ See the ‘Network Configuration’ section for assistance․

Contact Information & Support Resources

For immediate assistance with your RJO101 installation (current date: April 15th‚ 2026‚ 10:52:28)‚ please visit our comprehensive online support portal at www․example․com/support․ Here‚ you’ll find detailed troubleshooting guides‚ FAQs‚ and downloadable resources․

You can also reach our dedicated support team via email at support@example․com or by phone at +1-555-123-4567 (available Monday-Friday‚ 9 AM ౼ 5 PM EST)․ We offer multilingual support‚ leveraging translation tools for languages like German and French․

For warranty claims or technical specifications‚ refer to the respective sections within this manual․ We are committed to ensuring a smooth RJO101 experience․

champion 3500 watt generator manual

Champion 3500 Watt Generator Manual: A Comprehensive Guide

This comprehensive guide details operation and maintenance for your Champion 3500-watt generator, ensuring safe and efficient power.
It covers everything from initial setup to troubleshooting, referencing the official operator’s manual (model 100467) available as a PDF.

The Champion 3500-watt digital inverter generator (model 100467) offers a portable power solution for various needs, from camping and tailgating to home backup during outages. This manual provides essential instructions for safe operation and maintenance, ensuring longevity and optimal performance.

Champion Power Equipment has a rich history dating back to 1919, consistently delivering reliable and durable power solutions. The 3500-watt model is designed with user-friendliness in mind, featuring options like wireless remote start and economy mode for fuel efficiency. Understanding this generator’s capabilities and adhering to safety guidelines, detailed within this guide and the official PDF manual, are crucial for a positive user experience.

This guide will walk you through each step, from unboxing to troubleshooting, empowering you to confidently utilize your Champion generator.

Understanding Generator Safety

Prioritizing safety is paramount when operating a Champion 3500-watt generator. Important safety instructions are detailed in the owner’s manual and must be thoroughly reviewed before use. Never operate the generator indoors or in partially enclosed spaces due to the risk of carbon monoxide poisoning – a potentially fatal hazard.

Always ensure the generator is placed on a level surface and protected from the elements. Keep children and pets away from the operating generator. Avoid overloading the generator, as this can cause damage and pose a fire risk. Proper grounding is essential to prevent electrical shock.

Be cautious when handling fuel, and never refuel a running or hot generator. Refer to the manual for specific safety precautions regarding fuel storage and handling. Following these guidelines will ensure a safe operating experience.

Generator Components and Features

This section details the Champion 3500-watt generator’s key parts, including digital inverter technology and wireless start capabilities, as outlined in the operator’s manual.

Identifying Key Parts of the 3500 Watt Model

Familiarizing yourself with the Champion 3500-watt generator’s components is crucial for safe operation and maintenance. Key parts include the engine, fuel tank, control panel, muffler, and recoil starter (or electric start components). The control panel houses essential features like the power switch, outlets (typically 120V and potentially a 12V DC outlet), and indicator lights.

The fuel tank capacity dictates runtime, while the muffler reduces noise. Pay attention to the oil fill/dipstick for proper lubrication. For wireless start models, locate the battery compartment and charging port. The air filter housing protects the engine from debris. Refer to the official operator’s manual (model 100467) for a detailed diagram and specific part locations, ensuring accurate identification during maintenance or repairs.

Digital Inverter Technology Explained

Champion’s 3500-watt generator utilizes digital inverter technology, providing a cleaner, more stable power output compared to traditional generators. This technology automatically adjusts engine speed to match the electrical load, resulting in improved fuel efficiency and reduced noise levels.

Unlike conventional generators that produce a constant voltage, inverter technology delivers pure sine wave electricity, making it safe for sensitive electronics like laptops, smartphones, and televisions. This stable power minimizes the risk of damage. The inverter system converts DC power from the generator to clean AC power. Understanding this technology highlights the generator’s versatility and suitability for a wider range of applications, offering reliable power for both essential and delicate devices.

Wireless Start Capability Overview

Champion’s wireless start feature, available on select 3500-watt models (like 100554), offers convenient remote starting without the need for a pull cord. This utilizes a key fob to initiate the generator from a distance – up to 82 feet! The system includes a wireless remote and a receiver integrated into the generator’s control panel.

Before utilizing this feature, ensure the battery is properly connected and charged. The key fob allows for both starting and stopping the generator remotely. Important safety note: Always ensure the area around the generator is clear before initiating a wireless start. This feature enhances user convenience, especially in colder weather or when the generator is located in a hard-to-reach area;

Setting Up Your Generator

Proper setup is crucial for safe operation. This involves unboxing, inspecting components, adding oil and fuel, and, for wireless models, connecting the battery correctly.

Unboxing and Initial Inspection

Carefully unpack your Champion 3500-watt generator, ensuring all components are present. Refer to the parts list within the operator’s manual to verify everything is accounted for – this includes the generator itself, an oil funnel, and potentially a tool kit. Inspect the generator thoroughly for any shipping damage, such as dents, scratches, or loose parts.

Pay close attention to the control panel and ensure all switches and outlets appear undamaged. Check the oil drain plug and fuel tank cap for secure fitting. Before proceeding, review the included safety instructions and quick start guide. Document any damage immediately and contact Champion Power Equipment customer support. A visual inspection now can prevent issues later, guaranteeing optimal performance and longevity of your new generator.

Adding Oil and Fuel – Recommended Types

Before starting your Champion 3500-watt generator, adding the correct oil is crucial. Use SAE 10W-30 oil, and check the operator’s manual for capacity – typically around 18 ounces. Slowly add oil using the provided funnel, checking the dipstick frequently to avoid overfilling. Ensure the oil level reaches the “full” mark.

For fuel, use fresh, unleaded gasoline with a minimum octane rating of 87. Do not use fuel containing ethanol exceeding 10%, as it can damage the generator. Add a fuel stabilizer if the generator will be stored for extended periods. Always fill the fuel tank outdoors in a well-ventilated area, and avoid overfilling to allow for expansion.

Connecting the Battery (for Wireless Start Models)

For Champion 3500-watt generators with wireless start capability, proper battery connection is essential. Locate the battery compartment, typically secured with screws. Connect the red (positive) cable to the positive terminal and the black (negative) cable to the negative terminal, ensuring a secure fit.

Verify correct polarity before tightening connections. A fully charged 12V battery is required for optimal performance. The manual specifies the recommended battery type and capacity. Avoid reversing the polarity, as this can damage the generator’s electrical system. Once connected, test the wireless start function to confirm proper operation. Regularly check battery terminals for corrosion and clean as needed.

Starting and Operating the Generator

Follow step-by-step instructions for safe startup, understanding the control panel’s functions, and correctly connecting appliances to maximize the generator’s efficiency.

Step-by-Step Starting Instructions

Before starting, ensure the generator is on a level surface outdoors, away from flammable materials. Verify oil and fuel levels are correct, and the battery (if equipped) is connected. Turn the fuel valve to the ‘ON’ position. For electric start models, ensure the switch is set to ‘START’. For recoil start, gently pull the starter rope until resistance is felt, then pull briskly.

Allow the generator to warm up for a few minutes before connecting any appliances. Observe the control panel for indicator lights confirming proper operation. If the generator fails to start, refer to the troubleshooting section. Always disconnect the spark plug wire before performing any maintenance. Remember to consult the official manual for detailed diagrams and safety precautions.

Understanding the Control Panel

The Champion 3500-watt generator’s control panel features essential indicators and controls. Key components include the power switch, reset buttons for overload and low oil shutdown, and outlets (typically 120V and potentially USB ports). Indicator lights signal generator status – power, low oil, and overload conditions. The fuel valve controls fuel flow to the engine.

For wireless start models, a start button and indicator light are present. Familiarize yourself with the location of the circuit breakers protecting each outlet. The economy mode switch optimizes fuel efficiency. Refer to the manual’s diagram for precise labeling and function explanations. Understanding these controls ensures safe and efficient operation.

Connecting Appliances and Devices

Before connecting any appliance to your Champion 3500-watt generator, calculate its wattage requirements. Ensure the total running wattage of all connected devices does not exceed the generator’s rated output (3500 watts). Consider starting wattage, which is often higher for motors. Plug appliances directly into the generator’s outlets, avoiding extension cords whenever possible.

If extension cords are necessary, use heavy-duty, outdoor-rated cords of the appropriate gauge. Never overload outlets or daisy-chain multiple cords. Sensitive electronics may require a surge protector. Always turn off appliances before connecting or disconnecting them from the generator. Refer to the manual for specific guidance on safe electrical connections.

Maintenance and Troubleshooting

Regular upkeep is vital for optimal performance. This section details maintenance schedules, oil changes, spark plug replacements, and solutions for common operational issues.

Regular Maintenance Schedule

Maintaining your Champion 3500-watt generator is crucial for longevity and reliable performance. After the first 20 hours of operation, change the oil. Subsequently, change the oil every 100 hours or annually, whichever comes first. Inspect the air filter before each use, cleaning or replacing it as needed – a dirty filter restricts airflow and reduces efficiency.

Check the spark plug annually, cleaning or replacing it to ensure proper ignition. Inspect the fuel lines for cracks or leaks. Clean the generator exterior to prevent debris buildup. Run the generator with a light load for 30 minutes monthly to keep internal components lubricated. Always refer to the official manual for detailed instructions and specific recommendations tailored to your model.

Oil Change Procedure

To change the oil on your Champion 3500-watt generator, first, warm up the engine for a few minutes. Locate the oil drain plug beneath the generator and position a suitable oil drain pan; Remove the plug, allowing the old oil to drain completely. Consult the manual for the correct oil type and capacity – typically 10W-30 is recommended.

Once drained, reinstall the plug securely. Remove the oil fill cap and carefully pour in the new oil to the specified level, avoiding overfilling. Check the oil level with the dipstick. Dispose of the used oil responsibly at a recycling center. Always refer to the official Champion manual for detailed instructions and safety precautions.

Spark Plug Replacement Guide

Replacing the spark plug on your Champion 3500-watt generator requires a few simple steps. First, disconnect the spark plug wire. Use a spark plug socket to carefully remove the old spark plug. Consult your owner’s manual for the correct spark plug gap specification – typically around 0.030 inches.

Gap the new spark plug accordingly using a spark plug gapping tool. Carefully thread the new spark plug into the engine by hand to avoid cross-threading. Tighten it with the spark plug socket, but do not overtighten. Reconnect the spark plug wire securely. Regular spark plug replacement ensures optimal engine performance. Always refer to the official Champion manual for detailed instructions.

Troubleshooting Common Issues

Common problems like starting failures, overload protection, or low oil shutdowns are addressed in this section, referencing the official Champion 3500-watt manual.

Generator Won’t Start – Possible Causes

If your Champion 3500-watt generator fails to start, several factors could be at play. First, verify the fuel level and ensure fresh gasoline is being used; stale fuel is a frequent culprit. Check the oil level – the low oil shutdown will prevent starting to protect the engine.

Inspect the spark plug for fouling or damage, replacing it if necessary. Confirm the battery connection (for wireless start models) is secure and fully charged. Examine the fuel valve, ensuring it’s in the ‘on’ position. Also, check the circuit breaker; a tripped breaker can halt operation. Finally, ensure the generator is not in economy mode if a full load is required. Refer to the official manual for detailed diagrams and troubleshooting steps;

Overload Protection and Resetting

The Champion 3500-watt generator features overload protection, a crucial safety mechanism. This system automatically shuts down the generator when the connected electrical load exceeds its wattage capacity, preventing damage to both the generator and your appliances. If the generator shuts down due to overload, disconnect some appliances to reduce the load.

Locate the circuit breaker on the control panel. Reset the breaker by switching it to the ‘off’ position, then back to ‘on’. Ensure the total wattage of the reconnected appliances remains within the generator’s rated capacity. Avoid repeatedly resetting the breaker without addressing the overload issue. Consult the manual for specific wattage guidelines and safe operating practices to prevent future occurrences.

Low Oil Shutdown – What to Do

The Champion 3500-watt generator is equipped with a low oil shutdown sensor, a vital safety feature preventing engine damage. If the oil level drops too low, the sensor automatically stops the generator. Do not attempt to restart the generator until the oil level is corrected. Check the oil level using the dipstick, ensuring it falls within the ‘full’ range.

Add the recommended oil type (refer to the ‘Adding Oil and Fuel’ section) to restore the proper level. After adding oil, double-check the dipstick. If the generator still fails to start, consult the troubleshooting section for further assistance; Regular oil checks and timely oil changes are crucial for preventing low oil shutdowns and maintaining generator health.

Advanced Features and Usage

Explore parallel operation, economy mode for fuel savings, and understand wattage capacity for optimal performance with your Champion 3500-watt generator.

Parallel Capability – Connecting Two Generators

The Champion 3500-watt inverter generator offers parallel capability, allowing you to connect two units for doubled power output. This is ideal for running larger appliances or increased power demands. To connect, ensure both generators are running stably.

Utilize a dedicated parallel kit (sold separately) and follow the instructions meticulously. The kit includes the necessary cables and connectors. Connect the generators while they are off, then start them simultaneously.

The combined wattage will provide significantly more power, but always stay within the maximum capacity of both units. Properly distributing the load is crucial for stable operation and preventing overloads. Refer to the official manual for specific wiring diagrams and safety precautions regarding parallel operation.

Using the Economy Mode

Champion 3500-watt generators feature an Economy Mode, designed to optimize fuel efficiency and reduce noise levels. When activated, the generator automatically adjusts engine speed based on the connected load. This means the engine runs slower – and quieter – when power demand is low.

To engage Economy Mode, locate the corresponding switch on the control panel and set it to the ‘Eco’ position. The generator will initially run at full speed for a brief period before transitioning to the lower, fuel-saving speed.

However, be aware that large surges in power demand may temporarily disable Economy Mode as the generator ramps up to meet the increased load. It’s ideal for powering sensitive electronics and reducing running costs during lighter use.

Understanding the Generator’s Wattage Capacity

The Champion 3500-watt generator provides both starting (surge) and running (rated) wattage. Understanding this distinction is crucial for safe and effective operation. The generator delivers 3500 watts of starting power for a few seconds, enabling motor-driven appliances to overcome initial startup resistance.

However, the continuous, or running, wattage is lower – typically around 3000 watts. Exceeding this running wattage will trigger the overload protection, shutting down the generator. Always calculate the total wattage requirements of all connected devices before operation.

Consider both running and starting wattage when connecting appliances like refrigerators or air conditioners. Refer to the appliance’s nameplate for wattage information to avoid overloading the generator.

Manual Resources and Support

Access the official Champion 3500-watt generator manual (PDF) online for detailed guidance. Champion Power Equipment offers robust customer support and warranty registration options.

Locating the Official Champion 3500 Watt Manual (PDF)

Finding the official Champion 3500-watt generator manual in PDF format is crucial for safe and effective operation. Champion Power Equipment provides readily accessible digital copies of their manuals on their website. Specifically, for the 3500 Digital Inverter Generator (model 100467), a dedicated operator’s manual PDF is available for download.

A simple online search using terms like “Champion 3500 generator manual PDF” will quickly direct you to the official document. This manual contains vital information regarding safety precautions, assembly instructions, operating procedures, maintenance schedules, and troubleshooting tips. Always refer to the official PDF for the most accurate and up-to-date guidance, ensuring the longevity and reliable performance of your generator. Avoid relying on unofficial sources, as they may contain inaccuracies.

Champion Power Equipment Customer Support

Champion Power Equipment offers comprehensive customer support to assist owners of their 3500-watt generators. Should you encounter issues not addressed in the official operator’s manual, or require clarification on any aspect of your generator’s operation, their support team is readily available.

You can reach Champion’s customer support through various channels, including a dedicated phone line and email support. Their website provides a wealth of resources, including frequently asked questions (FAQs), troubleshooting guides, and warranty information; Champion is committed to ensuring customer satisfaction and providing prompt assistance with any product-related concerns. Detailed contact information and support resources are easily accessible on the official Champion Power Equipment website, ensuring a positive ownership experience.

Warranty Information and Registration

Champion Power Equipment provides a warranty on its 3500-watt generators, offering peace of mind to owners. The specific terms and duration of the warranty can vary, so it’s crucial to review the warranty documentation included with your generator or available on their official website.

Registering your generator is essential to activate the warranty and ensure you receive important updates and notifications. Registration typically requires providing your generator’s model number, serial number, and purchase date. Proper registration streamlines any potential warranty claims and demonstrates proof of ownership. Detailed warranty information, registration instructions, and claim procedures are readily available on the Champion Power Equipment website, guaranteeing a hassle-free experience.