lower east side neighborhood guide

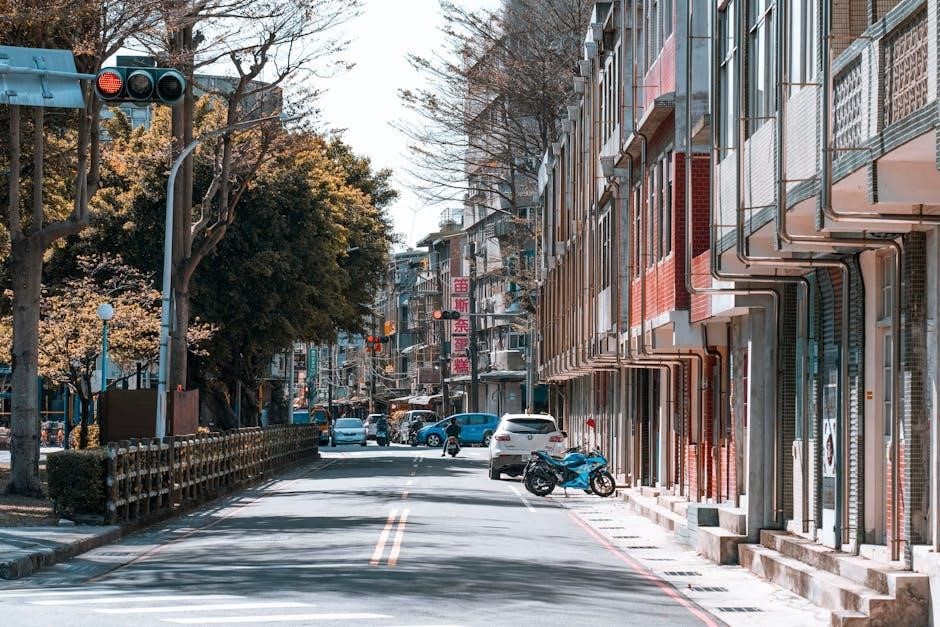
The Lower East Side is a vibrant and eclectic Manhattan neighborhood known for its rich history, cultural diversity, and artistic influence, offering a unique blend of old and new.

Overview of the Lower East Side

The Lower East Side is a vibrant and diverse neighborhood in Manhattan, known for its rich history, cultural significance, and eclectic mix of residents. Once a hub for immigrants, it has evolved into a trendy area with a blend of historic tenement buildings, boutique shops, and modern amenities. The neighborhood is celebrated for its artistic vibe, vibrant nightlife, and a mix of traditional eateries and contemporary dining spots, making it a unique and dynamic part of New York City.

A Brief History of the Lower East Side

The Lower East Side has a storied past as a gateway for immigrants arriving in New York City. In the late 19th and early 20th centuries, it was densely populated with tenements, housing waves of Jewish, Italian, and Eastern European newcomers. The neighborhood played a pivotal role in shaping the city’s cultural identity and labor movements. Today, its history is preserved through landmarks like the Tenement Museum, which tells the stories of these early residents and their contributions to the city’s growth and diversity.

Historic and Cultural Significance

The Lower East Side is a cultural melting pot, shaped by waves of immigration and artistic movements, making it a cornerstone of New York City’s identity and heritage.

Immigration History and Its Impact

The Lower East Side is a symbol of America’s immigrant history, welcoming waves of arrivals from Eastern Europe, Italy, and China during the late 19th and early 20th centuries. These immigrants brought diverse cultures, languages, and traditions, shaping the neighborhood’s identity. The area became a hub for innovation and resilience, with tenements and street vendors reflecting their struggles and contributions. This influx of people laid the foundation for the LES’s vibrant, eclectic character, influencing its food, art, and community spirit.

Cultural Landmarks and Museums

The Lower East Side is home to the Tenement Museum, a historic site preserving the stories of immigrant families who lived in the area during the 19th and early 20th centuries. The museum offers a glimpse into the neighborhood’s past through guided tours and exhibits. Additionally, the area features a mix of art galleries, cultural centers, and historic synagogues, reflecting its diverse heritage. These landmarks highlight the LES’s role as a cultural melting pot and a hub for artistic expression.

Real Estate and Housing

The Lower East Side offers a mix of historic tenements and modern developments, with rising property values and a blend of affordable and upscale housing options.

Current Trends in the Lower East Side Real Estate Market

The Lower East Side’s real estate market is experiencing a surge in demand, driven by its vibrant culture and proximity to downtown Manhattan. Property values are rising steadily, reflecting a shift towards modern luxury developments while preserving the area’s historic charm. The neighborhood is attracting both young professionals and families, making it a dynamic and competitive market for buyers and renters alike.

Options for Renters and Buyers

The Lower East Side offers diverse housing options, from historic walk-up buildings to modern high-rise apartments. Renters can find affordable studios and one-bedroom units, while buyers can explore restored tenements and luxury condos. The neighborhood’s eclectic vibe attracts a mix of young professionals, families, and artists. Prices remain relatively affordable compared to other Manhattan areas, making it a desirable choice for those seeking a dynamic, culturally rich environment with ample amenities nearby.

Dining and Nightlife

The Lower East Side is a culinary gem, offering diverse dining options from trendy restaurants to classic eateries, paired with a vibrant nightlife scene of bars and live music venues.

Popular Restaurants and Eateries

The Lower East Side boasts a diverse culinary scene, featuring iconic eateries like Katz’s Delicatessen, known for its classic pastrami sandwiches, and Russ & Daughters Cafe, offering Jewish appetizing dishes. Trendy spots such as Clinton St. Baking Company attract crowds for brunch, while Essex Market provides a variety of global flavors. The neighborhood’s eclectic mix of historic diners, modern restaurants, and multicultural eateries caters to every palate, making it a food lover’s paradise in Manhattan.

Best Bars and Nightlife Spots

The Lower East Side is renowned for its vibrant nightlife, offering a mix of trendy bars, speakeasies, and lively pubs. Hotspots like The Back Room and The Whiskey Ward provide intimate settings with craft cocktails, while places such as Pianos and Arlene’s Grocery host live music and performances. The neighborhood’s diverse bars cater to all preferences, from cozy dives to upscale lounges, creating a dynamic and energetic atmosphere for both locals and visitors to enjoy.

Shopping and Retail

The Lower East Side offers a unique shopping experience with boutique shops, vintage stores, and bustling markets, providing a diverse range of goods and eclectic finds;

Boutique Shops and Vintage Stores

The Lower East Side boasts a vibrant array of boutique shops and vintage stores, offering everything from artisanal goods to one-of-a-kind vintage finds. The neighborhood’s eclectic mix of independent retailers creates a unique shopping experience, with each store showcasing a distinct character. From handmade jewelry and rare books to vintage clothing and antique furniture, the streets are a treasure trove of creativity and history, reflecting the area’s diverse cultural influences.

Markets and Street Vendors

The Lower East Side is home to vibrant markets and street vendors, offering a diverse array of goods. From handmade crafts to vintage collectibles, these markets reflect the neighborhood’s eclectic spirit. Street vendors line the sidewalks, selling everything from fresh produce to unique souvenirs. The famous Essex Street Market stands out as a hub for artisanal foods, local art, and cultural treasures, embodying the area’s rich history and creative energy.

Parks and Outdoor Spaces

The Lower East Side offers green spaces and community gardens, enhancing urban life and providing recreational spots and events for residents and visitors alike, fostering community connections.

Notable Parks in the Lower East Side

The Lower East Side boasts a variety of parks and outdoor spaces that offer tranquility and recreation. East River Park is a sprawling green space along the river, featuring sports fields, walking paths, and stunning views of the Manhattan skyline. The East River Waterfront Esplanade provides a scenic promenade perfect for jogging or picnics. These parks serve as vital community hubs, fostering connections and providing respite from the bustling city life. They also host events and activities, enriching the neighborhood’s vibrant culture.

Community Gardens and Green Spaces

The Lower East Side is home to numerous community gardens and green spaces, which serve as peaceful oases in the bustling city. These gardens, often maintained by local residents, provide a space for urban agriculture, relaxation, and community events. Many were established decades ago, transforming vacant lots into vibrant green areas. They feature a variety of plants, flowers, and sometimes even public art. These spaces not only beautify the neighborhood but also foster a sense of community and environmental stewardship, making the LES a more livable and connected place to reside.

Arts and Entertainment

The Lower East Side is a hub for creative expression, featuring local art galleries, street murals, and performance venues that reflect its vibrant cultural identity.

Local Art Galleries and Studios

The Lower East Side is home to a variety of art galleries and studios, showcasing works by local, national, and international artists. From contemporary exhibitions to experimental installations, these spaces reflect the neighborhood’s vibrant cultural identity. Many galleries are nestled in historic buildings, blending the area’s rich history with modern creativity. Studios often host workshops and interactive exhibits, fostering a dynamic community of artists and art enthusiasts. The LES art scene is a testament to its enduring role as a creative hub.

Street Art and Murals

The Lower East Side is a canvas for vibrant street art and murals, reflecting its diverse cultural heritage and artistic spirit. Colorful murals adorn buildings, celebrating themes of identity, social justice, and community. These dynamic works, created by local and visiting artists, add to the neighborhood’s eclectic charm and make it a hotspot for urban art enthusiasts. The ever-changing street art scene ensures there’s always something new to discover in this creative corner of Manhattan.

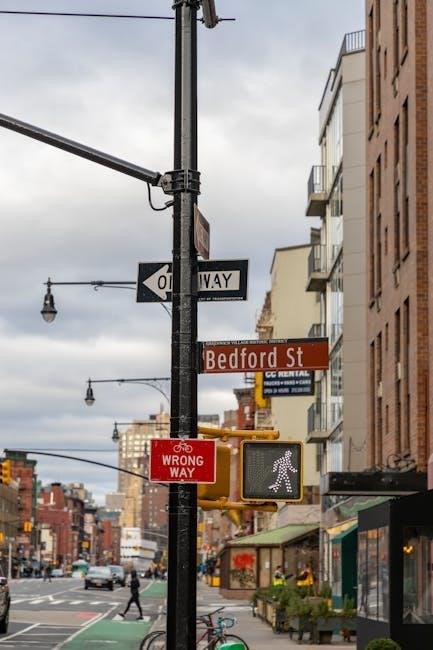
Transportation and Accessibility

The Lower East Side offers excellent transportation options, including subway lines F, J, M, Z, and buses like the M14 and M15. Bike-friendly paths along the East River and a walkable neighborhood make it easily accessible without a car.

Subway and Bus Options

The Lower East Side is well-connected by the F, J, M, and Z subway lines, with stations like Delancey Street and Essex Street providing easy access. The M14 and M15 buses offer extensive coverage, including Select Bus Service for faster trips. Subway trains run frequently, especially during peak hours, making commuting convenient. The neighborhood is also close to major hubs like Union Square and Brooklyn Bridge, ensuring seamless travel throughout the city. Buses operate late into the night, catering to diverse schedules.

Bike-Friendly Paths and Rentals

The Lower East Side offers several bike-friendly paths, including the East River Greenway, which runs along the river and provides scenic views. The neighborhood also features protected bike lanes on 13th Street, enhancing cyclist safety. Bike rentals are readily available through services like Citi Bike, with multiple docking stations across the area. This makes exploring the neighborhood and connecting to nearby destinations convenient and eco-friendly. The city’s bike-share program supports sustainable transportation in this vibrant community.

Safety and Community

The Lower East Side prioritizes safety through neighborhood initiatives and community programs, fostering a strong sense of unity and shared responsibility among its diverse residents and local businesses.

Neighborhood Safety Initiatives

The Lower East Side has implemented various safety measures, including neighborhood watch programs and increased police presence. Community organizations collaborate with local authorities to address concerns, ensuring a safer environment for residents and visitors alike. Initiatives focus on crime prevention, disaster preparedness, and fostering a sense of unity among the diverse population, making the area more secure and livable for all.

Community Events and Festivals

The Lower East Side hosts a variety of vibrant community events and festivals, celebrating its diverse cultural heritage. Annual highlights include outdoor concerts, street fairs, and cultural celebrations that bring residents together. These events showcase the neighborhood’s artistic spirit, with live music, food vendors, and interactive activities. They foster a strong sense of community and provide opportunities for social connection, making the LES a lively and inclusive place to live and visit.

kenmore oven model 790 manual

Welcome to the Kenmore Oven Model 790 manual, your comprehensive guide to understanding and operating this durable, stylish, and reliable cooking appliance. Designed for everyday use, this oven offers advanced features, efficient performance, and easy maintenance. This manual provides detailed instructions for installation, operation, and troubleshooting to ensure optimal use and longevity of your Kenmore oven.

Overview of the Kenmore Oven Model 790

The Kenmore Oven Model 790 is a durable, stylish appliance designed for reliable performance and convenience. Built with high-quality materials, it features a sleek stainless steel finish and advanced functionalities. The oven includes a venting system for proper air circulation, ensuring optimal baking results. Available in gas and electric models, such as the 790.3106 and 790.3107, it offers fingerprint-resistant surfaces and modern aesthetic appeal. With electronic controls, self-cleaning options, and a decorative accent light, this oven combines practicality and sophistication for everyday use.

Importance of Reading the Manual

Reading the Kenmore Oven Model 790 manual is essential for safe and effective use. It provides critical safety precautions, operating instructions, and troubleshooting tips. Understanding the manual ensures proper installation, maintenance, and operation, preventing potential hazards. It also highlights features like self-cleaning cycles and convection settings, helping users maximize the oven’s capabilities. By following the guidelines, users can extend the appliance’s lifespan and enjoy a seamless cooking experience while adhering to manufacturer recommendations.

Key Features and Specifications

The Kenmore Oven Model 790 features a durable stainless steel design, advanced cooking modes, and a self-cleaning function. It offers precise temperature control, a large cooking capacity, and energy efficiency, making it ideal for versatile culinary needs.

Design and Build Quality

The Kenmore Oven Model 790 boasts a sleek and modern design with a stainless steel finish, ensuring durability and resistance to fingerprints. Constructed from high-quality materials, it offers a robust build that withstands long-term use; The oven’s interior is spacious, accommodating large dishes and multiple racks for versatile cooking. Its electronic controls and intuitive interface enhance user experience, while the self-cleaning feature simplifies maintenance. This oven seamlessly blends functionality and aesthetics, making it a stylish addition to any contemporary kitchen.

Special Features of the Kenmore Oven Model 790

The Kenmore Oven Model 790 stands out with its advanced features, including a convection baking option for even cooking and faster results. It also offers a self-cleaning mode, making maintenance effortless. The oven features precise temperature control, a meat probe for perfect doneness, and a delay start function for convenient meal preparation. Additionally, the oven includes a warming drawer, ideal for keeping dishes hot until serving. These features combine to provide a versatile and efficient cooking experience tailored to modern culinary needs.

Safety Precautions and Guidelines

Always follow safety guidelines to ensure safe operation. Never block the oven vent, as proper airflow is essential. Use oven mitts when handling hot racks or dishes. Arrange racks only when the oven is cool to avoid burns. Keep flammable materials away from the oven and ensure proper ventilation during use.

General Safety Instructions

Always prioritize safety when using your Kenmore Oven Model 790. Never block the oven vent, as proper airflow is crucial for safe operation. Arrange oven racks only when the oven is cool to avoid burns. Use oven mitts or protective gloves when handling hot racks or dishes. Keep flammable materials away from the oven and ensure proper ventilation during cooking. Avoid wearing loose clothing near the oven to prevent accidental contact with heat sources. Follow all safety guidelines provided in the manual to ensure a safe and efficient cooking experience.

Proper Ventilation and Rack Arrangement

Ensure proper ventilation by never blocking the oven vent, as it releases warm air essential for even cooking. Arrange oven racks only when the oven is cool to prevent burns. Use oven mitts when handling racks or dishes. Position racks to allow adequate airflow and avoid overcrowding. Keep the area around the oven clear of flammable materials. Proper rack arrangement and ventilation are critical for safe and efficient cooking performance. Always refer to the manual for specific guidance on rack placement and ventilation maintenance.

Installation and Setup

Unpack the oven carefully and place it on a level surface. Ensure proper electrical connections and ventilation. Follow the manual’s setup instructions for initial calibration and operation.

Unpacking and Placement Guidelines

When unpacking your Kenmore Oven Model 790, ensure all components are included and undamaged. Place the oven on a sturdy, level surface, away from flammable materials. Allow at least 4 inches of clearance on all sides for proper air circulation. Ensure the floor can support the oven’s weight. Avoid placing the oven near water sources or direct sunlight. Follow the manual’s specific placement instructions to guarantee safe and efficient operation. Proper positioning is essential for optimal performance and safety.

Initial Setup and Calibration

After unpacking, ensure the oven is placed on a level surface. Set the clock by pressing the clock button and adjusting the time using the control panel. Check the oven temperature accuracy by comparing it with an oven thermometer. If calibration is needed, refer to the control panel instructions to adjust the temperature setting. Ensure all settings are correct before first use. Proper calibration ensures accurate cooking results and safe operation. Consult the manual for detailed calibration steps and guidelines.

Maintenance and Cleaning

Regular cleaning and proper maintenance are essential for optimal performance and longevity of your Kenmore oven. Clean the control panel, racks, and interior regularly. Use the self-cleaning cycle for deep cleaning, and avoid harsh chemicals. Refer to the manual for detailed instructions and safety precautions.

Regular Cleaning and Care Tips

Regular cleaning ensures optimal performance and longevity of your Kenmore oven. Wipe the control panel with a damp cloth and avoid harsh chemicals. Clean racks by soaking them in soapy water or running them through the dishwasher. Remove food spills promptly to prevent hardening. Use the self-cleaning cycle for deep cleaning, following manual instructions. Always let the oven cool before cleaning, and use oven mitts when handling racks. Regular maintenance helps maintain the oven’s efficiency and appearance.

Self-Cleaning and Deep Cleaning Instructions

For deep cleaning, use the self-cleaning cycle on your Kenmore oven. Remove racks and lock the door before starting. Set the cycle for 2-4 hours, depending on soil level. The oven heats to high temperatures, turning food residue into ash. After cooling, wipe ash with a damp cloth. For lighter cleaning, use the Flex Clean Cycle, which is faster and uses less heat. Always clean when the oven is cool and avoid using harsh chemicals for optimal results and maintenance.

Operating the Kenmore Oven Model 790

Operating the Kenmore Oven Model 790 is straightforward with its intuitive control panel. Preheat, set timers, and use convection or bake modes for precise cooking. Refer to the manual for detailed instructions on advanced features and settings to enhance your cooking experience.

Understanding the Control Panel

The Kenmore Oven Model 790 features a user-friendly control panel with intuitive buttons and a digital display. It allows you to set cooking modes (bake, convection, broil), adjust temperatures, and monitor cooking times. The panel includes a meat probe for precise temperature control and a minute timer for added convenience. The display provides clear feedback, ensuring accurate settings. Familiarize yourself with the panel’s layout and functions to optimize your cooking experience and explore advanced features like delay start and Sabbath mode for tailored use. Proper use ensures safety and efficiency.

Basic Cooking Functions and Modes

The Kenmore Oven Model 790 offers essential cooking functions, including bake, convection, broil, and roast modes. Each mode is designed for specific cooking needs, ensuring even heating and consistent results. The bake mode provides traditional cooking, while convection circulates air for faster results. Broil mode is ideal for searing, and roast mode ensures even browning. These functions are easily selectable via the control panel, allowing you to achieve perfect cooking outcomes for various dishes. Understanding these modes enhances your cooking versatility and efficiency, making meal preparation effortless and enjoyable.

Advanced Features and Settings

The Kenmore Oven Model 790 includes advanced features like convection cooking for faster results and a meat probe for precise temperature control. Delay start allows you to schedule cooking, while Sabbath mode ensures compliance with religious observances. The warmer drawer keeps dishes at the perfect temperature, and silent operation minimizes noise. These settings, accessible via the intuitive control panel, enhance cooking flexibility and convenience, catering to diverse culinary needs and preferences for a superior cooking experience.

Troubleshooting Common Issues

Identify and address common problems with your Kenmore Oven Model 790, such as error codes, uneven heating, or control malfunctions. Consult the manual for solutions or contact support if issues persist.

Identifying and Solving Common Problems

Common issues with the Kenmore Oven Model 790 include error codes, uneven heating, and rack placement problems. Refer to the manual for troubleshooting guides. For error codes, restart the oven or check connections. Uneven heating may result from improper rack arrangement or blocked vents. Clean the oven regularly to prevent food residue buildup. If self-cleaning malfunctions, ensure the door is latched correctly. For persistent issues, contact Kenmore customer support for professional assistance. Always follow safety guidelines when addressing problems.

When to Contact Professional Support

If issues with your Kenmore Oven Model 790 persist despite troubleshooting, contact professional support. This includes complex error codes, electrical malfunctions, or damaged components like shattered glass doors. Sears’ customer service can provide authorized technicians for repairs. Additionally, if the self-cleaning cycle fails or parts need replacement, reaching out to Kenmore’s support ensures safe and efficient solutions; Always prioritize safety and warranty coverage when seeking external assistance for your oven.

Warranty and Customer Support

The Kenmore Oven Model 790 is backed by a comprehensive warranty covering parts and labor for defective components. Sears offers dedicated customer support for inquiries, repairs, and maintenance, ensuring your oven performs optimally throughout its lifespan.

Understanding the Warranty Coverage

The Kenmore Oven Model 790 is protected by a comprehensive warranty program, ensuring coverage for parts and labor under specific conditions. The standard warranty typically lasts for one year from the date of purchase, covering defective materials and workmanship. Extended warranty options may also be available for added protection. To maintain warranty validity, proper registration and adherence to maintenance guidelines are required. Exclusions include damage caused by misuse, accidents, or failure to follow instructions. Always review the warranty terms for detailed coverage specifics.

Reaching Kenmore Customer Service

For assistance with your Kenmore Oven Model 790, customer service is readily available to address your inquiries and concerns. Visit the official Kenmore website at www.kenmore.com for contact details, support resources, and troubleshooting guides. You can also reach Kenmore support via phone or live chat for personalized help. Ensure you have your model number and a detailed description of your issue ready for efficient service. The Kenmore team is dedicated to providing timely and effective solutions to ensure your satisfaction.

User Reviews and Feedback

Users praise the Kenmore Oven Model 790 for its durable design and reliable performance, with many highlighting its self-cleaning feature and user-friendly interface. However, some note the manual’s complexity as a minor drawback, emphasizing the need for clear instructions to fully utilize its advanced functions.

Positive Aspects Highlighted by Users

Users consistently praise the Kenmore Oven Model 790 for its durable construction and sleek, stainless steel finish, which resists fingerprints and smudges. The self-cleaning feature is a major highlight, simplifying maintenance. Many appreciate the intuitive control panel and versatile cooking functions, including convection bake and roast. The oven’s consistent temperature control and even heating ensure excellent cooking results. Additionally, the artistic design enhances kitchen aesthetics, making it a practical and stylish addition for home cooks and professionals alike.

Common Complaints and Concerns

Some users have reported issues with the Kenmore Oven Model 790, including shattering glass doors during self-cleaning cycles. Others mention the control panel can be complex to navigate, requiring frequent manual referencing. Additionally, there have been complaints about excessive noise from the oven fan during operation. A few users also noted that the oven racks can be challenging to arrange properly, especially when the oven is hot. These concerns highlight areas where user experience could be improved for better satisfaction.

kidkraft summit view playset manual

Welcome to the KidKraft Summit View Playset manual! This guide provides essential instructions for safe assembly, usage, and maintenance of your playset, ensuring endless fun for kids.

1.1 Overview of the Summit View Playset

The KidKraft Summit View Playset is a three-level, feature-rich wooden playset designed for outdoor adventures. It includes a fort, double slide, tube slide, kitchen, grill, rock wall, and fireman pole. Made from FSC-certified cedar wood, it ensures durability and safety. The playset promotes active and imaginative play, offering endless fun for kids. Its sturdy construction and thoughtful design make it a perfect addition to any backyard, encouraging creativity and physical activity in a safe environment.

1.2 Importance of Following the Manual

Following the KidKraft Summit View Playset manual is crucial for ensuring safe and proper assembly, operation, and maintenance. The manual provides detailed safety warnings, assembly instructions, and troubleshooting tips to prevent accidents and ensure longevity. Adhering to the guidelines helps avoid structural issues, protects the warranty, and ensures compliance with safety standards. Proper assembly following the manual guarantees a secure and durable playset, allowing children to enjoy it safely for years to come.

Safety Warnings and Precautions

Ensure a safe environment by following all safety guidelines, avoiding public settings, and checking for exposed threads post-assembly to prevent injuries and structural issues.

2.1 General Safety Guidelines

Adult supervision is crucial during play. Ensure children meet age and weight requirements. Avoid using the playset in public settings like schools or parks. Regularly inspect for loose parts or damage. Tighten all bolts and check for exposed threads after assembly. Ensure the play area is clear of hazards and properly surfaced with materials like wood chips or rubber mulch. Follow all assembly instructions carefully to maintain structural integrity and safety. Proper maintenance ensures longevity and safe enjoyment of the playset.

2.2 Protective Surfacing Requirements

Install proper protective surfacing around the playset to ensure safety. Use materials like wood chips or rubber mulch, maintaining a minimum depth of 9 inches. Extend surfacing at least 6 feet in all directions from the playset. This cushioning helps prevent injuries from falls. Regularly inspect and replenish surfacing materials to maintain their effectiveness. Ensure the area is clear of debris and tripping hazards. Proper surfacing is essential for safeguarding children during play and meeting safety standards.

Product Specifications

The KidKraft Summit View Playset is crafted from durable, FSC-certified materials, featuring a three-story fort, multiple slides, and play areas designed for imaginative outdoor adventures.

3.1 Dimensions and Material Details

The KidKraft Summit View Playset measures approximately 16′ (W) x 15′ (D) x 12′ (H). Constructed from premium, FSC-certified cedar wood, it ensures durability and weather resistance. The playset includes sturdy beams and high-quality hardware for safe assembly and long-lasting performance. Its natural wood finish blends seamlessly into outdoor settings while maintaining a timeless aesthetic appeal. The materials are carefully selected to provide a safe and sturdy structure for children to enjoy.

3.2 Weight Capacity and Age Recommendations

The KidKraft Summit View Playset has a maximum weight capacity of 810 lbs, ensuring safe play for multiple children. It is recommended for kids aged 3 to 10 years, promoting active and imaginative outdoor fun. The playset is designed for residential use only and should not be installed in public settings like schools or parks. Always follow the age and weight guidelines to ensure safe and enjoyable use of the playset.

Assembly Instructions

Assembly requires two people and can take 4-26 hours, depending on the model. Follow the detailed step-by-step guide in the manual for a safe and proper setup.

4.1 Tools and Hardware Required

To assemble the KidKraft Summit View Playset, gather essential tools like a drill, screwdrivers, wrenches, and safety gear. The manual provides a detailed list of hardware, including bolts, screws, and Allen keys. Ensure all parts are organized before starting to streamline the process. Refer to the manual for specific quantities and sizes to avoid delays. Proper tools and hardware are crucial for a secure and stable structure, ensuring safety and durability for years of play.

4.2 Step-by-Step Assembly Process

Begin by organizing all hardware and tools. Start with the main frame, attaching legs and support beams securely. Follow the manual’s sequence for installing slides, climbing walls, and upper fort structures. Use the BILT app for 3D guidance. Ensure all bolts and screws are tightened properly. Attach swings, ropes, and accessories last. Double-check each step for stability and safety. Allocate time for each section, as assembly can take 4-26 hours depending on complexity. Work methodically to ensure a sturdy and safe playset.

4.3 Time Estimates for Completion

Assembly of the KidKraft Summit View Playset typically requires 4 to 26 hours, depending on the model and complexity. Allocate time for each section, as larger models may need up to a full day; Working with two people is recommended for efficiency. Use the BILT app for 3D guidance to streamline the process. Plan your schedule accordingly to ensure a smooth and timely assembly, resulting in a safe and sturdy playset for your children to enjoy.

4.4 Common Assembly Challenges

Common challenges include aligning large components and ensuring proper fitment. The complexity of 3D instructions can sometimes confuse first-time assemblers. Hardware installation, like bolts and screws, may require extra care to avoid overtightening. Exposed threads after assembly are a frequent concern, so double-check all connections. Working with a partner is highly recommended, especially for heavier parts. Use the BILT app for visual guidance to overcome these hurdles and ensure a sturdy, safe structure for your playset.

Maintenance and Upkeep

Regular cleaning with mild detergents and seasonal inspections are crucial. Ensure all bolts are secure, and reseal wooden parts annually to protect from weather damage for longevity.

5.1 Cleaning and Inspection Tips

Regular maintenance ensures the longevity of your KidKraft Summit View Playset. Clean the playset with mild detergents and water, avoiding harsh chemicals. Inspect weekly for wear and tear, tightening loose bolts and replacing worn components promptly. Seasonally, check for wood rot or damage and reapply sealant to protect against weathering. Remove debris and ensure all surfaces remain smooth and safe for play. Regular upkeep helps maintain safety and extend the playset’s lifespan for years of enjoyment.

5.2 Seasonal Maintenance Recommendations

Perform seasonal checks to ensure your KidKraft Summit View Playset remains durable and safe. Before winter, apply waterproof sealant to protect the wood and cover the playset if possible. In spring, inspect for winter damage and clean thoroughly. Summer months require checking for pest infestations, while autumn involves preparing for weather changes. Regular reapplication of wood treatments and securing all components seasonally will maintain the playset’s integrity and ensure it remains a safe, enjoyable space for children year-round.

Troubleshooting Common Issues

Identify and address common issues like loose parts or damage promptly. Tighten bolts, replace worn components, and ensure all safety features are intact for continued safe use.

6.1 Identifying and Addressing Loose Parts

Regularly inspect the playset for loose bolts, screws, or wooden components. Tighten any loose parts immediately using the tools provided. Check areas like the swings, slides, and climbing walls. If a part is damaged or worn, replace it to ensure safety. Refer to the manual for specific tightening torque and replacement guidelines. Use the BILT app for visual guidance on securing components properly. Addressing loose parts promptly prevents accidents and maintains the playset’s stability and durability over time.

6.2 Repairing Damaged Components

If components like wood, bolts, or accessories are damaged, assess the extent of the damage. Replace any severely damaged parts using original KidKraft replacements. For minor wear, sand rough edges or tighten loose bolts. Always follow the manual’s repair guidelines or use the BILT app for 3D guidance. Ensure all repairs are sturdy to maintain safety and prevent further damage. Regular maintenance can help identify issues early, keeping the playset safe and functional for years to come.

Additional Features and Accessories

The KidKraft Summit View Playset offers exciting add-ons to enhance playtime, such as slides, climbing walls, and interactive accessories. Customize your playset with optional features like a kitchenette or grill for imaginative play. Explore KidKraft’s range of compatible accessories to tailor the playset to your child’s preferences. Visit the official website or check the BILT app for a full list of available enhancements and installation guides to maximize your playset’s potential.

7.1 Optional Add-Ons for Enhanced Play

The KidKraft Summit View Playset offers optional add-ons to elevate playtime. Choose from slides, climbing walls, and interactive accessories like a kitchenette or grill. These features foster imaginative play and adventure. Customize your playset with additional components such as a rope ladder or sandbox. Visit KidKraft’s official website or the BILT app for a comprehensive list of compatible add-ons. These enhancements ensure your playset remains engaging and tailored to your child’s interests, encouraging creativity and physical activity.

7.2 Compatibility with Other KidKraft Products

The KidKraft Summit View Playset is designed to seamlessly integrate with other KidKraft products, offering a cohesive play experience. Compatible items include additional play structures, storage solutions, and themed accessories. This compatibility allows you to expand your play area while maintaining a consistent design and quality. Visit KidKraft’s official website to explore compatible products and create a comprehensive outdoor play system tailored to your child’s needs and preferences;

Using the BILT App for Assembly

The BILT app offers a innovative way to assemble the KidKraft Summit View Playset with 3D interactive instructions. Download the app from the Apple App Store or Google Play to access step-by-step guidance. It provides a user-friendly experience with voice, text, and animated instructions, making assembly easier and more efficient. The app is compatible with iOS and Android devices, ensuring you can navigate the assembly process smoothly and confidently.

8.1 Downloading and Navigating the App

To begin, download the BILT app from the Apple App Store or Google Play. Once installed, search for “KidKraft Summit View Swing Set” or enter your specific model number to access the instructions. The app features a user-friendly interface with 3D interactive guides, voice instructions, and animations to simplify the assembly process. Navigate through each step seamlessly, ensuring a smooth and organized approach to building your playset. The app is compatible with both iOS and Android devices, making it accessible for all users.

8.2 Benefits of 3D Interactive Instructions

The BILT app’s 3D interactive instructions offer a visual and immersive assembly experience. Users can rotate, zoom, and explore each part from every angle, reducing confusion and errors. The step-by-step animations and voice guidance provide clarity, making the process more efficient. This feature is particularly helpful for complex components, ensuring all parts are correctly aligned and secured. The interactive format also allows users to track their progress visually, enhancing overall assembly efficiency and confidence.

Warranty and Customer Support

KidKraft offers a comprehensive warranty and dedicated customer support. Visit their official website or contact their team directly for assistance with any inquiries or concerns regarding your playset.

9.1 Understanding the Warranty Terms

KidKraft provides a limited warranty for the Summit View Playset, covering manufacturing defects for a specified period. The warranty typically lasts one year from the date of purchase and excludes normal wear and tear. It’s essential to review the manual for full details on what is covered and any exclusions. For questions or claims, contact KidKraft’s customer support team directly. Proper assembly and maintenance, as outlined in the manual, are required to ensure warranty validity and continued product performance.

9.2 Contacting KidKraft Customer Service

For assistance with your Summit View Playset, contact KidKraft’s customer service team at customerservice@kidkraft.com or call 1.800.933.0771. Their support team is available Monday-Friday, 8 AM to 5 PM CST. Visit their website to submit a contact form or find additional resources. Ensure to have your product model number and order details ready for faster assistance. KidKraft aims to respond promptly and resolve inquiries efficiently, providing support for warranty claims, assembly help, and more.

The KidKraft Summit View Playset manual is your comprehensive guide to safe assembly, maintenance, and enjoyable use of this exceptional playset. By following the instructions and safety guidelines, you ensure a durable and fun playground for years to come. If questions arise, reach out to KidKraft’s customer service for support. This playset promises imaginative play, outdoor adventures, and lasting memories for your children, making it a worthwhile investment for any family.

canon imageclass mf3010 user manual

The Canon imageCLASS MF3010 is a sleek, compact monochrome laser MFP designed for home and small office use․ It combines stylish design, energy efficiency, and reliable performance for printing, scanning, and copying tasks․ With its user-friendly interface and space-saving design, it’s an ideal choice for everyday document management needs․

1․1 Overview of the Canon imageCLASS MF3010

The Canon imageCLASS MF3010 is a monochrome laser MFP designed for home and small office use․ It offers print, scan, and copy functionalities with a compact design and user-friendly interface․ Featuring A4 size support, it delivers 18 ppm print speed and 1200 x 600 dpi resolution․ The device comes with a toner cartridge, power and USB cables, and a software CD․ Its energy-efficient performance and space-saving design make it ideal for everyday document management needs․

1․2 Key Features and Benefits

The Canon imageCLASS MF3010 is a monochrome laser MFP offering print, scan, and copy functionalities․ It features a compact, space-saving design and energy-efficient operation, making it ideal for small offices and home use․ With a print speed of 18 ppm and 1200 x 600 dpi resolution, it delivers crisp, professional-quality documents․ The device supports A4 paper size and has a 150-sheet paper capacity․ Its user-friendly interface and MF Toolbox software simplify task management, ensuring efficient document handling and multitasking capabilities․

Installation and Setup

The Canon imageCLASS MF3010 setup involves unboxing, connecting via USB, and installing drivers from the provided CD-ROM․ Ensure all cables are securely connected for proper functionality․

2․1 Unboxing and Preparation

When unboxing the Canon imageCLASS MF3010, carefully remove all packaging materials and protective covers․ Inside, you’ll find the printer, a trial toner cartridge, power cable, USB cable, software CD-ROM, and a quick reference guide․ Before powering on, ensure all protective films are removed from the control panel and other components․ Gently insert the toner cartridge as instructed in the manual․ Connect the power cable securely and prepare for installation by loading paper into the input tray․ Ensure all cables are properly connected for smooth operation․

2․2 Connecting the Printer to Your Computer

To connect the Canon imageCLASS MF3010 to your computer, use the provided USB cable․ Plug one end into the printer’s USB port and the other into your computer’s USB slot․ For Windows or Mac, insert the software CD-ROM to install the Canon MF3010 printer driver․ Follow the on-screen instructions to complete the installation; Ensure the printer is powered on during this process․ For Mac users, the UFR II driver is recommended․ Refer to the manual for troubleshooting any connection issues․

2․3 Installing the Printer Software and Drivers

Insert the provided software CD-ROM into your computer․ Run the installer and follow the on-screen instructions to install the Canon MF3010 printer driver and MF Toolbox software․ Select the components you wish to install, such as the printer driver, scanner driver, and utility tools․ If the CD is unavailable, download the latest drivers from the Canon website․ Ensure your computer is connected to the printer via USB before proceeding․ Restart your computer after installation to ensure proper functionality․

Printer Drivers and Software

The Canon imageCLASS MF3010 requires compatible printer drivers and software for optimal performance․ Download the latest drivers from the Canon website or use the provided CD-ROM․

3․1 Downloading and Installing the Latest Drivers

To ensure optimal performance, download the latest drivers for the Canon imageCLASS MF3010 from the official Canon support website․ Follow these steps: visit the Canon website, search for the MF3010 model, select your operating system, and download the appropriate driver package․ Run the installer, follow on-screen instructions, and restart your system after installation․ This ensures compatibility and access to all printer features․ Drivers can also be installed using the provided CD-ROM for offline setup․

3․2 Using the MF Toolbox Software

The MF Toolbox software enhances the functionality of your Canon imageCLASS MF3010, offering comprehensive scanning management and print settings configuration․ It allows users to efficiently scan documents, configure printer settings, and access maintenance tools for optimal performance․ Designed for both Windows and Mac systems, this utility streamlines tasks, ensuring a seamless printing experience․

3․3 Configuring Printer Settings for Optimal Performance

Configuring printer settings on the Canon imageCLASS MF3010 ensures enhanced print quality and efficiency․ Adjust the print resolution to 1200 x 600 DPI for crisp text and graphics․ Select the appropriate paper type and size to match your document needs․ Enable duplex printing for automatic double-sided printing, saving paper․ Utilize the toner saver mode to reduce toner consumption for draft prints․ Additionally, configure connectivity settings like USB or network options for reliable printing․ These adjustments optimize performance for various printing tasks, ensuring professional results․

User Manual and Documentation

The Canon imageCLASS MF3010 user manual provides comprehensive guidance for installation, operation, and troubleshooting․ Available in both print and digital formats, it includes a quick reference guide for easy navigation and everyday tasks, ensuring users can maximize their device’s functionality effectively․

4․1 Navigating the User Manual

Navigating the Canon imageCLASS MF3010 user manual is straightforward, with a clear table of contents guiding users through installation, operation, and troubleshooting․ The manual is divided into logical sections, making it easy to find specific information quickly․ Key areas include setup instructions, printing, scanning, and copying functions․ A quick reference guide is also provided for everyday tasks, while digital versions offer searchable content and bookmarks for efficient navigation․ This ensures users can easily access the information they need to optimize their device’s performance․

4․2 Quick Reference Guide for Everyday Tasks

The Quick Reference Guide provides a concise overview of essential operations for the Canon imageCLASS MF3010․ It covers basic printing, scanning, and copying functions, along with button layouts and error handling․ Designed for easy access, the guide helps users quickly locate solutions for common tasks without delving into the full manual․ Available both in print and digital formats, it ensures that users can efficiently navigate everyday operations, making it an indispensable resource for streamlining workflow and troubleshooting minor issues․ This guide is particularly useful for new users seeking to familiarize themselves with the device’s core functions․

4․3 Electronic Manual and Multilingual Support

The Canon imageCLASS MF3010 comes with an electronic manual accessible via the provided CD or download․ This multilingual support ensures users worldwide can understand and operate the device effortlessly․ The manual is available in multiple languages, catering to a global audience․ It features a user-friendly interface with search functions and zoom options for easy navigation․ The electronic format allows for convenient updates and quick access to troubleshooting guides, making it a versatile resource for all users․ This ensures optimal functionality and user satisfaction across different regions and languages․

Printing, Scanning, and Copying

The Canon imageCLASS MF3010 offers efficient printing, scanning, and copying with a speed of 18 ppm and 1200×600 DPI resolution, ensuring sharp and clear monochrome outputs for all tasks․

5․1 Printing Documents: Settings and Tips

Print high-quality documents with the Canon imageCLASS MF3010 at 1200×600 DPI resolution․ Set paper size to A4 for standard printing․ Enable duplex printing for double-sided output․ Adjust print quality settings via the driver for draft or high-resolution modes․ For optimal results, use genuine Canon toner cartridges․ To save resources, select the Eco mode․ Always check paper alignment in the 150-sheet tray․ Regularly clean the printer to maintain performance․ These settings ensure sharp, professional prints every time, ideal for home or small office use․

5․2 Scanning Documents: Resolution and Formats

The Canon imageCLASS MF3010 scanner supports an optical resolution of 600 DPI and an interpolated resolution of up to 9600 DPI․ It allows scanning in formats like TIFF, BMP, JPEG, and PNG․ Users can save scanned documents directly to a USB device or computer․ The MF Toolbox software enables adjustments to resolution, brightness, and contrast for optimized scans․ Preview mode helps review images before saving․ This feature ensures high-quality scans for both personal and professional use, making it versatile for various document management needs․

5․3 Copying Documents: Speed and Quality

The Canon imageCLASS MF3010 copies documents at a speed of up to 18 pages per minute, ensuring quick and efficient duplication․ It supports high-quality copying with a resolution of 1200 x 600 DPI, delivering sharp and clear text․ Users can copy multiple pages with ease, up to 99 copies in one operation․ Adjustments for brightness and contrast can be made to optimize copy quality․ This feature makes it ideal for producing professional-looking copies in both home and office environments․

Maintenance and Troubleshooting

Regular cleaning of the printer and updating firmware ensures optimal performance․ Troubleshooting common issues like paper jams or print quality problems can be resolved quickly with the user manual’s guidance․

6․1 Regular Maintenance Tasks

Regular maintenance ensures the Canon imageCLASS MF3010 operates efficiently․ Clean the printer exterior and interior periodically to remove dust and debris․ Check the paper trays and rollers for dust buildup and clean as needed․ Replace toner cartridges when low, and ensure proper alignment․ Update firmware regularly for optimal performance․ Refer to the user manual for detailed cleaning instructions and troubleshooting tips to maintain print quality and extend device longevity․

6․2 Common Issues and Solutions

Common issues with the Canon imageCLASS MF3010 include paper jams, poor print quality, and connectivity problems․ For paper jams, turn off the printer, carefully remove the jammed paper, and restart․ For blurred prints, clean the printer head or toner cartridge․ Connectivity issues can be resolved by restarting the printer and router or reinstalling drivers․ Refer to the troubleshooting guide in the user manual for detailed solutions to ensure smooth operation and maintain print quality․

6․3 Updating Firmware and Software

Regularly updating the firmware and software for the Canon imageCLASS MF3010 ensures optimal performance and security․ Visit the official Canon website to download the latest updates․ Connect the printer to your computer via USB or network, then follow the on-screen instructions to install the updates․ Ensure the printer is turned on and do not interrupt the process․ Updated firmware enhances functionality, fixes bugs, and improves compatibility with new operating systems, keeping your device running smoothly and securely․

Technical Specifications

The Canon imageCLASS MF3010 is a monochrome laser MFP with 1200×600 dpi resolution, 18 ppm print speed, and a 150-sheet input capacity․ It features USB connectivity and energy efficiency, making it ideal for small workspaces while delivering crisp, professional-quality prints․

7․1 Print Resolution and Speed

The Canon imageCLASS MF3010 delivers sharp prints with a resolution of 1200 x 600 dpi and a print speed of 18 pages per minute in black and white․ It ensures crisp text and detailed graphics, making it suitable for professional documents․ The first print is ready in approximately 6 seconds, optimizing productivity․ With a memory capacity of 64 MB, it efficiently handles multiple print jobs․ Ideal for small offices, it balances speed and quality for everyday printing needs․

7․2 Paper Handling and Compatibility

The Canon imageCLASS MF3010 offers a 150-sheet input tray and a 100-sheet output tray, ensuring efficient paper handling․ It supports A4, A5, and B5 paper sizes, as well as custom sizes․ The printer is compatible with various paper types, including plain, recycled, and heavy paper․ With optional additional trays, it can handle larger print volumes․ Its compact design and versatile paper handling make it ideal for small offices and home use, ensuring reliable performance for diverse printing needs․

7․3 Connectivity Options and Energy Efficiency

The Canon imageCLASS MF3010 features a USB 2․0 interface for direct connection to computers, ensuring reliable and fast data transfer․ It supports Energy Star certification, promoting energy efficiency and reducing environmental impact․ The printer operates at a low power consumption of approximately 1․2W in standby mode, making it an eco-friendly choice for small offices and home use․ Its energy-efficient design helps minimize electricity costs while maintaining high-performance printing capabilities․

Support and Resources

Canon offers comprehensive support, including online resources, FAQs, and downloadable manuals․ Users can contact Canon support for assistance or access warranty and repair options easily online․

8․1 Contacting Canon Support

Canon provides reliable support for the imageCLASS MF3010․ Users can visit the official Canon website for live chat, phone numbers, and email options․ Additionally, contacting local authorized Canon dealers is recommended for repairs or specific inquiries․ Online resources and FAQs are also available to address common concerns promptly․ Reaching out through these channels ensures quick resolution to any issues, ensuring uninterrupted use of the printer․

8․2 Online Resources and FAQs

Canon offers extensive online resources and FAQs for the imageCLASS MF3010․ Visit the official Canon website for access to user manuals, driver downloads, and troubleshooting guides․ The FAQ section addresses common questions about installation, printing, and maintenance․ Additional resources include quick reference guides and electronic manuals for easy access․ These resources ensure users can resolve issues quickly and make the most of their printer’s features․ For detailed support, explore the Canon website․

8․3 Warranty and Repair Options

The Canon imageCLASS MF3010 comes with a limited warranty that covers manufacturing defects for a specific period․ For repair services, contact an authorized Canon dealer or service center․ Ensure to use genuine Canon parts for maintenance to avoid voiding the warranty․ Visit the official Canon website for detailed warranty terms and repair options․ Users can also refer to the Canon support page for more information on repair procedures and warranty claims․

adora refrigerator manual

Welcome to the Adora Refrigerator Manual․ This guide provides essential information for optimal performance, troubleshooting, and maintenance․ Explore key features and user-friendly designs to enhance your experience․

1․1 Purpose and Scope of the Manual

This manual is designed to help you understand and operate your Adora refrigerator effectively․ It provides detailed information on installation, operational features, and maintenance․ The guide also covers troubleshooting common issues and offers energy-saving tips․ By following this manual, you’ll ensure optimal performance, extend the appliance’s lifespan, and make informed decisions for its care․ Refer to this resource for comprehensive support tailored to your Adora refrigerator needs․

1․2 Key Features of the Adora Refrigerator Series

The Adora Refrigerator Series offers advanced temperature control systems, ensuring consistent cooling․ It features an ice maker, water dispenser, and LED lighting for enhanced visibility․ The series also includes energy-efficient designs, meeting ENERGY STAR certification․ With flexible storage options and quiet operation, these refrigerators provide a blend of functionality and modern aesthetics, catering to both practical and style-conscious users while maintaining optimal performance and energy savings․

General Specifications of the Adora Refrigerator

The Adora Refrigerator offers capacities ranging from 24․8 to 27․7 cubic feet, with ENERGY STAR certification for energy efficiency․ Its design features stainless steel finishes and advanced cooling systems for optimal performance and reliability․

2․1 Capacity and Dimensions

The Adora Refrigerator series offers capacities ranging from 24․8 to 27․7 cubic feet, providing ample storage for groceries and beverages․ Dimensions vary by model but typically measure around 35․75 inches in width, 69․75 inches in height, and 36․25 inches in depth, ensuring a perfect fit in standard kitchens․ Always check specific model details for exact measurements to ensure compatibility with your space․

2․2 Energy Efficiency and Ratings

The Adora Refrigerator series is designed with energy efficiency in mind, featuring ENERGY STAR certification for select models․ Advanced insulation, LED lighting, and optimized cooling systems reduce energy consumption․ The DFE28JMKES model, for example, boasts an estimated annual energy consumption of 576 kWh․ Always look for the EnergyGuide label to compare energy use and cost savings, ensuring your appliance meets environmental standards while lowering utility bills․

2․3 Design and Finish Options

The Adora Refrigerator series offers sleek designs with various finish options, including stainless steel and black․ Models like the DFE28JMKES feature French-door layouts, while others offer side-by-side configurations․ Capacities range from 24․8 to 27․7 cubic feet, catering to different storage needs․ Angled LED lighting illuminates compartments, enhancing visibility․ The designs emphasize modern aesthetics and functionality, ensuring seamless integration into any kitchen decor while providing easy access to fresh food and freezer sections․

Installation and Setup Guide

This section guides you through unpacking, correct placement, leveling, and connecting water and electrical supplies․ Ensure the area is dry and stable for optimal operation․

3․1 Unpacking and Placement Guidelines

When unpacking, ensure the refrigerator is free from damage and all accessories are included․ Place it on a firm, level surface, maintaining at least 1 inch of clearance around the sides and back for proper airflow․ Avoid exposing the appliance to direct sunlight or moisture․ Ensure the floor is stable and secure the refrigerator to prevent movement․ Allow adequate space for doors to open fully without obstruction․

3․2 Leveling and Aligning the Refrigerator

Ensure the refrigerator is placed on a level surface to maintain proper operation․ Use a leveling tool to check the floor and adjust the appliance’s legs or rollers as needed․ Align the doors to ensure even closure and prevent sealing issues․ Secure the unit firmly to avoid movement․ Proper leveling and alignment are crucial for efficient performance and to prevent operational issues․ Follow manufacturer guidelines for precise adjustments․

3․3 Connecting Water and Electrical Supplies

Connect the water supply line to the refrigerator’s inlet valve, ensuring no leaks․ Plug the appliance into a grounded electrical outlet rated for 120V, 60Hz․ Avoid using extension cords․ Turn on the water supply and check for leaks at all connections․ Ensure the electrical connection is secure and meets safety standards․ Refer to the manual for specific model requirements and diagrams to ensure proper setup and functionality of water and ice features․

Operating Instructions

Set optimal temperatures for freshness․ Use the ice and water dispenser correctly․ Organize shelves for efficient storage․ Follow energy-saving guidelines for best performance and longevity․

4․1 Temperature Control Settings

Adjust temperature settings for optimal freshness and energy efficiency․ Set the refrigerator between 37°F and 40°F, and the freezer at 0°F for ideal food preservation․ Use the control panel to regulate temperatures, ensuring proper cooling․ Regularly check settings to maintain consistency․ For specific guidance, refer to the user manual or manufacturer instructions․ Proper temperature control helps prevent spoilage and reduces energy consumption․

4․2 Using the Ice Maker and Water Dispenser

Ensure the water supply is connected to use the ice maker․ Activate the ice maker by flipping the switch, and wait for ice production․ For the water dispenser, press and hold your glass against the sensor until water flows․ Clean the dispenser regularly․ Replace the water filter every 6 months for optimal performance․ Refer to the manual for troubleshooting or maintenance tips specific to your model․

4․3 Adjusting Shelves and Storage Compartments

Adjust shelves by pulling them out and repositioning at desired heights․ Remove shelves by lifting up and pulling forward․ Drawer compartments can be customized for organization․ Clean shelves before reinstalling․ Ensure proper alignment for smooth operation․ Refer to the manual for specific instructions tailored to your Adora model to maximize storage efficiency and maintain optimal performance․

Maintenance and Care Tips

Regularly clean the interior and exterior to maintain hygiene and efficiency․ Replace water filters every six months․ Check door seals for tight closure to prevent air leaks․

5․1 Cleaning the Interior and Exterior

Regularly clean the interior with mild soap and warm water to maintain hygiene․ Wipe down shelves and compartments with a soft cloth․ For the exterior, use a stainless steel cleaner if applicable․ Avoid harsh chemicals to prevent damage․ Clean the door seals to ensure proper closure․ Check and clean the drain cap and evaporator pan periodically․ Use a microfiber cloth to polish surfaces for a sleek appearance․ Ensure all areas are dry to prevent moisture buildup․

5․2 Replacing Water Filters

To replace the water filter, locate it in the top right corner of the refrigerator․ Turn the filter counterclockwise to remove it, then discard the old one․ Insert the new filter, aligning it properly, and turn it clockwise until it clicks․ Flush the system by running water for 2-3 minutes to remove air and debris․ Replace the filter every 6 months or as indicated by the indicator light․ Use only GE-certified filters for optimal performance․

5․3 Checking Door Seals and Gaskets

Regularly inspect door seals for cracks, tears, or wear․ Clean them with mild soap and water to ensure proper sealing․ Replace damaged seals immediately to maintain energy efficiency and prevent leaks․ Check alignment by closing the door gently; it should shut evenly without effort․ If uneven, adjust hinges or replace seals as needed․ Properly functioning seals are crucial for optimal cooling and humidity control․

Troubleshooting Common Issues

  • Check temperature settings if cooling is inconsistent․
  • Inspect for leaks around doors or water dispensers․
  • Ensure proper door alignment to prevent air gaps․

6․1 Diagnosing Temperature Fluctuations

Temperature fluctuations in your Adora refrigerator can occur due to incorrect settings or blocked vents․ First, ensure the temperature control is set properly․ Check if vents are obstructed by stored items․ Verify door seals for tight closure to maintain consistent cooling․ If issues persist, consult the manual or contact customer support for further assistance․

6․2 Addressing Leaks or Water Dispenser Problems

Leaks or issues with the water dispenser can often be resolved by checking water supply connections for tightness; Ensure the water filter is clean or replaced as needed․ If the dispenser drips, clean it with a soft cloth․ For persistent leaks, inspect tubing for damage․ Refer to the manual for diagnostic codes or contact GE customer support for professional assistance if problems persist․

6․3 Resetting the Refrigerator After a Power Outage

After a power outage, unplug the refrigerator, wait 10-15 minutes, and plug it back in․ Allow the system to stabilize for 30 minutes before adjusting settings․ Check temperature controls and ensure doors are sealed properly․ If issues persist, consult the manual or contact GE support for assistance․ Regular maintenance ensures optimal performance and energy efficiency after a power interruption․

Warranty and Customer Support

Understand your warranty coverage and access dedicated customer support․ Call 1-800-626-2005 for assistance․ Find manuals and schedule service appointments online․

7․1 Understanding the Warranty Coverage

Your Adora refrigerator is backed by a comprehensive warranty from GE Appliances․ The warranty covers parts and labor for defective components during the specified period․ Refer to your manual or GE’s website for detailed terms and conditions․ For inquiries, contact customer support at 1-800-626-2005․ Proper installation and regular maintenance are essential to uphold warranty validity and ensure optimal performance․

7․2 Contacting GE Customer Service

For assistance with your Adora refrigerator, contact GE Customer Service at 1-800-626-2005․ Representatives are available to address questions, concerns, and service needs․ Visit the GE Appliances website for additional support resources, including live chat and email options․ Ensure you have your model number ready for efficient assistance․ Support is available Monday through Friday, 8 AM to 8 PM ET, excluding holidays․

7․3 Scheduling Service Appointments

To schedule a service appointment for your Adora refrigerator, contact GE Customer Service at 1-800-626-2005․ Representatives are available Monday through Friday, 8 AM to 8 PM ET, excluding holidays․ Visit the GE Appliances website for online scheduling options․ Ensure you have your refrigerator’s model number ready to expedite the process․ For urgent issues, request a service appointment promptly to avoid further complications․

Energy-Saving Tips for Adora Refrigerator Owners

Optimize storage, monitor settings, and maintain your Adora refrigerator regularly to enhance energy efficiency and reduce consumption effectively․

8․1 Optimizing Storage to Reduce Energy Use

Proper storage organization is key to reducing energy consumption․ Keep items neatly arranged to ensure air flows efficiently, avoiding overpacking․ Store frequently used items in easy-to-reach locations and keep shelves balanced․ Use airtight containers for perishables to maintain humidity levels and reduce cooling demands․ Regularly clean and organize compartments to prevent dust buildup, which can hinder performance․ Proper storage habits help maintain optimal energy efficiency and extend the lifespan of your Adora refrigerator․

8․2 Monitoring and Adjusting Settings for Efficiency

Regularly monitor your Adora refrigerator’s settings to ensure optimal energy use․ Adjust temperature controls to maintain ideal levels for freshness without overcooling․ Use the ice maker and water dispenser wisely, as constant operation increases energy consumption․ Check the user manual for guidance on customizing settings․ Proper adjustments can significantly enhance efficiency and lower energy bills while maintaining performance․

8․3 Regular Maintenance to Maintain Efficiency

Regular maintenance ensures your Adora refrigerator operates efficiently; Clean condenser coils annually to improve airflow and reduce energy consumption․ Check and replace water filters every 6 months to maintain water quality and ice production․ Inspect door seals for tight closure to prevent air leaks․ Schedule professional servicing if issues arise․ Consistent upkeep prolongs appliance life and maintains optimal performance․

forbidden lands pdf

Forbidden Lands is a tabletop RPG where players survive in a harsh, mystical world․ The PDF offers core rules, character creation, and a quickstart guide for beginners, blending exploration, strategy, and storytelling․

Overview of the Forbidden Lands

Forbidden Lands is a tabletop role-playing game set in a harsh, mystical world where survival and exploration are key․ Players take on the roles of adventurers, raiders, or settlers, navigating a land fraught with danger․ The game emphasizes open-world exploration, strategic combat, and character development․ The Forbidden Lands PDF provides a comprehensive guide, including core rules, character creation, and a quickstart manual for new players․ It also features detailed settings like the Bloodmarch and the Spellbinder’s Domain, offering a rich narrative and immersive gameplay․ The PDF is designed for both players and gamemasters, ensuring a seamless experience․

Brief History and Background

The Forbidden Lands is a mystical realm shaped by ancient conflicts and dark magic․ Once a prosperous land, it was cursed after the Spellbinder’s daughter defied the gods, leading to its corruption․ The Demon-King, a powerful ruler, now governs over the Spellbinder’s Domain, enforcing harsh rule․ Players navigate this perilous world, where survival is a daily struggle․ The Bloodmarch, a treacherous journey, is central to the lore, offering challenges and secrets․ This grim setting provides a rich backdrop for exploration, combat, and storytelling, immersing players in a world of danger and wonder․

Gameplay Mechanics in Forbidden Lands

Forbidden Lands combines skill-based progression, tactical combat, and open-world travel․ The quickstart PDF introduces core mechanics, making it accessible for new players to dive into the adventure․

Skills and Character Development

In Forbidden Lands, skills define your character’s abilities, shaping interactions and survival․ Development is organic, with progression tied to challenges and experiences․ The quickstart PDF outlines core skills and advancement, while reference sheets aid players in tracking growth․ Character creation is deep, allowing unique backstories and personalities․ Players can craft detailed histories, influencing gameplay dynamics․ The system emphasizes adaptability, enabling characters to evolve based on choices and hardships․ This approach ensures each character is distinct, with a rich narrative woven into the game world, enhancing both individual and party-driven stories․ The PDF resources provide tools to guide and enrich character development seamlessly․

Combat System and Strategies

Forbidden Lands features a tactical and deadly combat system, emphasizing strategy and resource management․ The d12-based resolution mechanic adds unpredictability, requiring players to think critically․ The quickstart PDF outlines core combat rules, while reference sheets help track stats and abilities․ Combat is brutal, rewarding clever positioning and coordination․ Players must adapt, using terrain and skills creatively to outmaneuver foes․ Survival demands balancing aggression with caution, as even minor wounds can impact gameplay․ The system encourages teamwork and inventive problem-solving, making each battle unique and memorable․ This approach ensures combat remains engaging and challenging, fitting seamlessly into the game’s survival-focused design․ Strategy is key to success․

Quickstart PDF Guide

The Quickstart PDF Guide is a free 152-page introduction to Forbidden Lands, offering core rules, combat, and travel mechanics, plus a reference sheet for players․

Features and Benefits

The Forbidden Lands Quickstart PDF Guide offers a comprehensive introduction to the game, featuring essential rules for skills, combat, and travel․ It includes a complete adventure, perfect for new players and veterans alike․ The guide provides a streamlined experience, allowing quick character creation and easy-to-follow mechanics․ Players benefit from reference sheets, ensuring smooth gameplay․ This free resource is ideal for those eager to explore the Forbidden Lands universe without committing to the full core set․ Its concise format and clear instructions make it an invaluable tool for starting adventures in this open-world survival RPG․

Players Guide

The Players Guide helps create unique characters with backstories using dice rolls, offering a personalized experience in the Forbidden Lands, available as a free PDF resource․

Character Creation and Backstories

The Players Guide offers a detailed system for crafting unique characters, with a focus on creating rich backstories․ Using a few dice rolls, players can generate distinct personalities, motivations, and histories for their characters․ This approach ensures each adventurer has a personalized journey in the Forbidden Lands․ The guide also provides tools for fleshing out characters, making them more immersive in the game world․ Whether you’re a seasoned player or new to tabletop RPGs, this section helps you build a character that stands out, enhancing both individual and group storytelling experiences in this open-world survival roleplaying game․

Gamemaster’s Guide

The Gamemaster’s Guide provides essential tools for managing the game, including detailed information on the Forbidden Lands’ secrets․ It enhances the GM’s role with specific resources, ensuring a captivating experience for all players by offering insights into the world’s lore and mechanics, helping to craft unique and engaging adventures while maintaining the game’s balance and depth․ The guide is indispensable for creating immersive stories and challenges tailored to players’ actions and decisions, making the Forbidden Lands a dynamic and unpredictable environment for exploration and survival․

Tools for Managing the Game

The Gamemaster’s Guide equips GMs with comprehensive tools to manage Forbidden Lands․ It includes detailed world-building aids, NPC stats, and adventure hooks․ These resources help create immersive scenarios, ensuring dynamic gameplay․ The guide also offers tips for balancing encounters and maintaining player engagement․ With these tools, GMs can craft unique stories and challenges, making each session memorable․ The guide is essential for both new and experienced GMs, providing the necessary support to weave compelling narratives in the harsh, mystical setting of the Forbidden Lands, ensuring every adventure is filled with mystery, danger, and opportunity for heroism or despair, tailored to the players’ choices and actions․

Setting of Forbidden Lands

Forbidden Lands is set in a mystical, unforgiving world where players explore harsh terrains like the Bloodmarch and face the rule of the demon-king in Spellbinder’s Domain․

Geography and Notable Locations

The Forbidden Lands feature diverse and treacherous terrains, including the Bloodmarch, a harsh and unforgiving region filled with danger․ Notable locations like the Pit of Firestead, a perilous area, and the misty mountains of Ravenland highlight the world’s vastness․ Spellbinder’s Domain, ruled by the demon-king, adds a layer of dark mystery, while other areas like the Bitter Reach offer unique challenges․ These locations are central to the game’s open-world survival aspect, providing players with countless opportunities for exploration and adventure․

  • The Bloodmarch: A dangerous journey through harsh terrain․
  • Ravenland: Known for its misty mountains and eerie landscapes․
  • Spellbinder’s Domain: A dark realm under the demon-king’s rule․

The Bloodmarch is a dangerous journey through unforgiving lands, featuring locations like the Pit of Firestead, a perilous area filled with challenges and hidden dangers․

Exploring the Harsh Terrain

The Bloodmarch is a perilous region in Forbidden Lands, characterized by its unforgiving environment and treacherous landscapes․ Players must navigate through dangerous areas like the Pit of Firestead, a volatile location fraught with risks․ The terrain is as much a challenge as the enemies that inhabit it, requiring careful resource management and strategic decisions․ This harsh setting forces adventurers to adapt, relying on their skills and ingenuity to survive․ The Bloodmarch is not just a physical journey but a test of endurance, where every step could lead to discovery or disaster․ Its mysteries and dangers make it a cornerstone of Forbidden Lands’ immersive experience․

Spellbinder’s Domain

Spellbinder’s Domain, ruled by the demon-king and his daughter, is a land of dark magic and oppressive rule․ The Rust Witch enforces their power, maintaining control through fear․

Rule of the Demon-King

The demon-king’s rule over Spellbinder’s Domain is marked by tyranny and fear․ With his daughter by his side, he wields dark magic to maintain control․ The Rust Witch serves as his enforcer, spreading decay and terror․ Their dominion is unyielding, crushing any dissent․ The land itself appears cursed, with twisted landscapes and eerie phenomena․ Travelers face constant danger, from the demon-king’s minions to the corrupting influence of the environment․ Despite the harsh conditions, whispers of rebellion persist, offering faint hope for those brave enough to challenge the demon-king’s oppressive regime․

Resources and Reference Sheets

Forbidden Lands offers free reference sheets and PDF guides to aid players and GMs, including character creation tools, quickstart rules, and essential summaries for gameplay․

Available Materials for Players

The Forbidden Lands PDF offers extensive resources, including a free 152-page quickstart guide with rules for skills, combat, and travel․ Players can access reference sheets in both vertical and horizontal formats, aiding gameplay․ The Players Guide provides detailed character creation tools, allowing players to craft unique backstories with dice rolls․ These materials are designed to enhance gameplay, offering essential summaries and tools for both new and experienced players․ The quickstart PDF is particularly beneficial for newcomers, providing a comprehensive introduction to the game’s mechanics and world․ Free downloads ensure accessibility, making it easy for anyone to embark on their Forbidden Lands adventure․

Forbidden Lands PDF offers a captivating blend of survival and fantasy, inviting players to explore a harsh, mystical world․ The core book and quickstart guide provide comprehensive rules and tools, while the Players Guide enhances character creation․ Reference sheets and detailed backstories add depth, ensuring an immersive experience․ The game’s open-world design encourages exploration and strategy, making it a standout in tabletop RPGs․ With its rich setting and versatile resources, Forbidden Lands PDF is a must-have for both newcomers and seasoned adventurers, promising endless journeys through its unforgiving yet enchanting landscapes․ Embark on your adventure today and uncover the secrets of the Forbidden Lands․