Kettlebell training is a dynamic‚ versatile workout method ideal for beginners. It combines strength‚ mobility‚ and cardio‚ offering a full-body exercise with minimal equipment. Start with an 8kg kettlebell‚ master foundational moves like the swing‚ and progress safely to build strength and confidence.
1.1 Why Kettlebells Are Ideal for Beginners
Kettlebells are perfect for beginners due to their versatility and ease of use. They provide a full-body workout‚ improving strength‚ mobility‚ and coordination. Starting with a single kettlebell‚ such as an 8kg weight‚ allows beginners to master foundational movements like the swing without feeling overwhelmed. The compact design makes them portable and cost-effective‚ requiring minimal space. Kettlebell exercises are also low-impact compared to heavy weights‚ reducing injury risk. They allow for gradual progression‚ making it easy to increase difficulty as fitness levels improve. This accessibility and efficiency make kettlebells an excellent choice for those new to strength training.
Benefits of Kettlebell Exercises for Beginners
Kettlebell exercises offer a full-body workout‚ improving strength‚ mobility‚ and cardiovascular fitness. They enhance muscle mass‚ boost metabolism‚ and burn calories efficiently‚ perfect for beginners seeking versatility and results.
2.1 Full-Body Workout and Efficiency
Kettlebell exercises provide a full-body workout‚ engaging multiple muscle groups simultaneously. This efficiency makes them ideal for beginners seeking to improve strength and cardio without spending hours in the gym. Each movement‚ like the kettlebell swing‚ works the legs‚ core‚ and upper body‚ promoting coordination and overall fitness. The dynamic nature of kettlebell training ensures that no muscle is left untouched‚ offering a time-effective way to build strength and endurance. By combining strength training with cardiovascular benefits‚ kettlebell exercises help beginners achieve a well-rounded fitness routine in minimal time. This holistic approach makes kettlebell training a practical choice for those looking to maximize their workout efficiency.

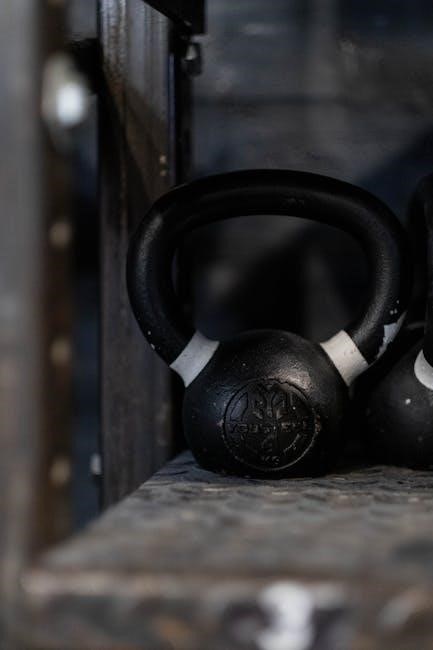
Choosing the Right Kettlebell Weight
Beginners should start with a lighter kettlebell‚ such as 8kg‚ to focus on proper form and technique. Adjust the weight as strength and confidence grow.
3.1 Starting Weights for Beginners
For novices with no prior weight training experience‚ it’s recommended to start with an 8kg kettlebell. This weight allows beginners to focus on proper form and technique without being overwhelmed. Men with some strength background can begin with 12kg or 16kg‚ while women often start with 8kg. The key is to prioritize form over weight to avoid injuries and build a strong foundation. As you master the basic exercises‚ you can gradually increase the weight. Consistency and progressive overload are essential for seeing results. Starting light ensures you can perform exercises safely and effectively‚ setting you up for long-term success in kettlebell training.
Mastering Basic Kettlebell Exercises
Begin with the kettlebell swing‚ a foundational movement that engages the entire body; Progress to exercises like the clean and jerk‚ ensuring proper form and controlled movements.
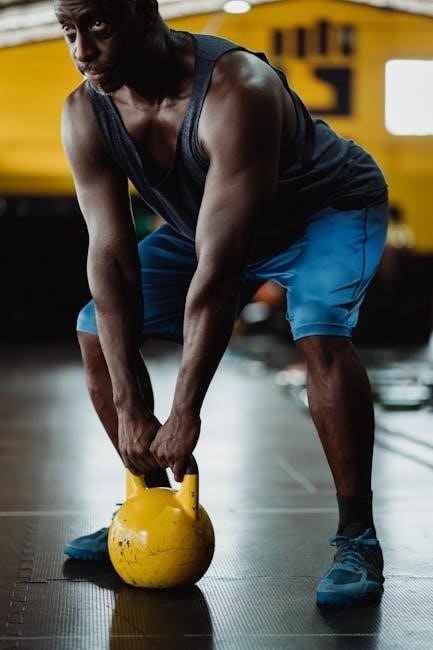
4.1 The Kettlebell Swing: A Foundation Movement
The kettlebell swing is a fundamental exercise for beginners‚ targeting the entire body while improving coordination and power. It engages the hips‚ legs‚ and core‚ mimicking natural movement patterns. Start with a lighter weight to focus on form: hinge at the hips‚ swing the kettlebell back between the legs‚ then thrust hips forward to propel it to shoulder height; Avoid using arms alone; generate power from the hips. This exercise builds strength‚ endurance‚ and coordination. Mastery of the swing is essential before progressing to more complex movements‚ as it forms the basis of many kettlebell exercises. Consistent practice ensures proper technique and maximizes benefits.

Safety Tips for Beginner Kettlebell Workouts
Focus on proper form to avoid injuries. Start with lighter weights‚ warm up thoroughly‚ and rest between sets. Prioritize controlled movements and breathing techniques.
5.1 Proper Form to Avoid Injuries
Proper form is essential for safe and effective kettlebell training. Start with a neutral spine‚ engage your core‚ and ensure the kettlebell moves smoothly without jerking. Keep your shoulders relaxed‚ avoiding rounding or shrugging. For swings‚ hinge at the hips and let the kettlebell swing back between your legs‚ avoiding poor form that strains the lower back. Always prioritize controlled movements over heavier weights. Practice slow‚ deliberate reps to build muscle memory and prevent injuries. If form falters‚ stop and reset—consistency and safety are key to long-term progress.
Sample Kettlebell Workout Routine for Beginners
A 20-minute routine includes kettlebell swings (15 reps)‚ goblet squats (10 reps)‚ shoulder presses (8 reps)‚ bent-over rows (10 reps)‚ and halos (12 reps). Rest between sets.
6.1 A 20-Minute Kettlebell Workout Plan
Begin with a 5-minute warm-up‚ including light swings and bodyweight squats. Perform 3 sets of 12 kettlebell swings‚ focusing on explosive power. Next‚ do 3 sets of 10 goblet squats‚ holding the kettlebell close to your chest. Follow with 3 sets of 8-10 one-arm presses‚ alternating sides. Finish with 3 sets of 15 Russian twists‚ twisting your torso while holding the kettlebell. End with a 5-minute cool-down‚ stretching your shoulders‚ hips‚ and hamstrings. This plan builds strength‚ improves coordination‚ and burns fat efficiently‚ perfect for beginners aiming to progress gradually.
Progressing with Kettlebell Exercises
As you gain confidence and strength‚ gradually increase the kettlebell weight and difficulty of exercises. Master advanced movements like the kettlebell snatch and clean before progressing further.
7.1 When to Increase Weight and Difficulty
Progressing with kettlebell exercises requires patience and attention to form. Beginners should increase weight when they can consistently perform exercises with proper technique and control. A good indicator is when the current weight feels too light‚ and movements become effortless. Start by adding small increments‚ such as 2-4 kg‚ to gradually build strength. Avoid rushing the process‚ as improper form can lead to injuries. Focus on mastering each movement before advancing. This balanced approach ensures steady progress and reduces the risk of overtraining. Always prioritize quality over quantity to build a strong foundation for more challenging workouts.
Kettlebell Exercises for Upper Body
Target your upper body with kettlebell exercises like the snatch‚ press‚ and bent press. These workouts focus on shoulders‚ arms‚ and chest without involving the legs.
8.1 Workouts Without Involving the Legs
For those who need to avoid leg movements‚ kettlebell exercises can still be effective. The kettlebell snatch and bent press target the upper body‚ focusing on shoulders‚ arms‚ and core. Seated or standing shoulder presses isolate the deltoids‚ while halos improve mobility and stability. The kettlebell windmill enhances flexibility without leg engagement. Even the clean and jerk can be adapted to focus solely on upper body strength. These exercises are ideal for individuals with leg injuries or those who wish to prioritize upper body development. Always maintain proper form to prevent injury and maximize results.
Incorporating Kettlebells into Your Fitness Routine
Kettlebells can seamlessly integrate into any fitness routine‚ complementing cardio‚ strength‚ or mobility exercises. They enhance traditional workouts and offer a dynamic‚ efficient full-body training option.

9.1 Combining with Other Training Methods
Kettlebell exercises can be seamlessly integrated with other training methods to enhance overall fitness. For example‚ pairing kettlebell swings with bodyweight exercises like push-ups or squats creates a balanced full-body workout. Additionally‚ incorporating kettlebells into yoga or mobility routines can improve flexibility and coordination. Many beginners also combine kettlebell training with cardio activities‚ such as running or cycling‚ to boost endurance. This versatile approach allows individuals to tailor their fitness regimen to their goals‚ whether it’s building strength‚ improving mobility‚ or increasing cardiovascular health. By mixing kettlebells with other methods‚ workouts stay engaging and progress remains consistent. This integration is key to a well-rounded fitness journey.
Kettlebell training is a powerful‚ accessible way for beginners to build strength and improve fitness. Start with the basics‚ progress safely‚ and enjoy lasting results.
10.1 Final Tips for Success with Kettlebell Training
Consistency and patience are key to mastering kettlebell exercises. Start with lighter weights to build strength and technique‚ then gradually increase the load. Focus on proper form to prevent injuries and maximize results. Incorporate a variety of exercises to keep your workouts engaging and balanced. Combine kettlebell training with other fitness methods‚ like cardio or mobility drills‚ for a well-rounded routine. Stay motivated by tracking your progress and celebrating small victories. Most importantly‚ listen to your body and rest when needed. With dedication and the right approach‚ kettlebell training can transform your fitness journey and help you achieve your goals effectively.