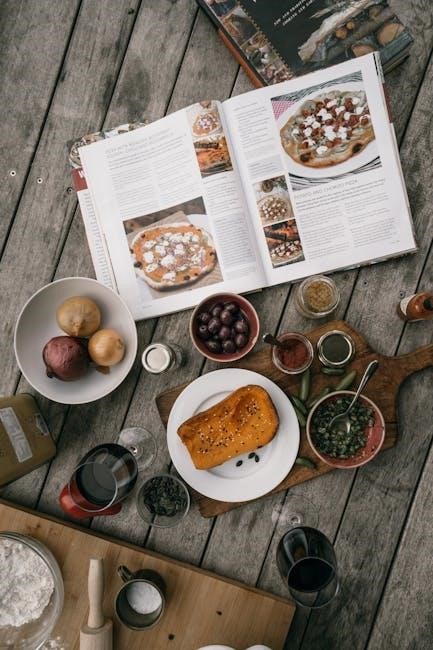
Unlock the secret to baking incredibly decadent Ghirardelli Triple Chocolate Cookies with ease. This popular mix, often available in multi-packs at retailers like Costco or Sam’s Club, provides everything needed for a rich, satisfying treat. Each box typically yields around 40 delightful, easy-to-prepare cookies.
Ghirardelli is synonymous with unparalleled chocolate quality, and their Triple Chocolate Cookie Mix upholds this esteemed reputation, inviting bakers into a world of rich, decadent indulgence. Crafted for those who appreciate a truly luxurious chocolate experience, this mix transforms simple baking into an extraordinary culinary adventure. It’s designed to deliver the signature intense yet smooth chocolate flavor that enthusiasts have come to expect from the brand. Whether you’re a seasoned baker or just starting, the Ghirardelli Triple Chocolate Cookie Mix promises a consistently delicious outcome, making gourmet-level cookies accessible to all. The allure of Ghirardelli lies in its commitment to premium ingredients, ensuring that each bite of these cookies is a celebration of deep, complex chocolate notes. This mix is not just about convenience; it’s about delivering a superior dessert that embodies the very essence of chocolate decadence, creating soft, chewy cookies with a profound chocolate presence. It’s a testament to Ghirardelli’s mastery in creating an unforgettable sweet treat, perfect for any occasion.
Understanding the Triple Chocolate Experience
The Ghirardelli Triple Chocolate experience is a meticulously crafted journey into the heart of cocoa decadence, designed to deliver an unparalleled depth of flavor. This signature blend typically combines a harmonious trio of chocolate components: rich semi-sweet chips, substantial chocolate chunks, and often a foundational cocoa powder integrated into the mix. Each element contributes uniquely to the complex profile. The semi-sweet chips melt beautifully, creating smooth, sweet pockets throughout the cookie, while the larger chocolate chunks provide a satisfying textural contrast and bursts of intense, sometimes bittersweet, flavor. The underlying cocoa powder further amplifies the overall chocolate essence, ensuring a deeply robust and luxurious taste that permeates every bite. This thoughtful combination prevents the cookies from being one-dimensional, instead offering a dynamic and utterly satisfying indulgence. It is this masterful integration of varied chocolate forms and intensities—semi-sweet, chunks, and cocoa powder—that defines the extraordinary Ghirardelli Triple Chocolate experience, transforming a simple cookie into a gourmet delight for any chocolate lover.

Basic Ghirardelli Cookie Preparation
Basic Ghirardelli cookie preparation involves combining the dry mix contents in a bowl. Add the required eggs and oil according to package instructions. Mix these ingredients thoroughly to form a consistent dough. This foundational step ensures delicious results.
Standard Mix Ingredients
The Ghirardelli Triple Chocolate Cookie Mix is renowned for its premium components, ensuring a consistently delicious outcome. A typical 17.5-ounce package contains a perfectly balanced blend of dry ingredients, including flour, sugars, and leavening agents, pre-measured for convenience. Crucially, the mix is generously studded with an assortment of high-quality Ghirardelli chocolate varieties. These often include semi-sweet chocolate chips, rich bittersweet chocolate chips, and sometimes even larger chocolate chunks, contributing to the “triple chocolate” experience. Some variations might also incorporate cocoa powder within the mix itself to deepen the overall chocolate flavor profile, resulting in soft and chewy cookies. To complete the basic preparation, users typically need to supply a few fresh ingredients. These standard additions usually include eggs and a specified amount of oil, often vegetable or canola, as directed by the instructions printed on the packaging. These simple additions combine with the sophisticated mix to create a truly decadent dessert, embodying the luxurious taste expected from Ghirardelli.
Essential Mixing Steps
To achieve the perfect Ghirardelli Triple Chocolate Cookies, adhering strictly to the essential mixing steps outlined on the package is paramount. Typically, the process begins by emptying the entire contents of the Ghirardelli cookie mix pouch into a large mixing bowl. Next, the specified wet ingredients, which usually include a couple of large eggs and the recommended amount of vegetable oil (or a suitable alternative like canola or avocado oil), are added to the dry mix. It’s crucial to follow the precise measurements for these additions to ensure the correct dough consistency. Once all ingredients are in the bowl, gentle mixing is key. Begin by stirring on a low speed, or by hand with a sturdy spoon, until the dry ingredients are just moistened. Continue mixing until a cohesive dough forms, being careful not to overmix, as this can lead to tough cookies. Scrape down the sides of the bowl periodically to ensure all ingredients are thoroughly incorporated. The resulting dough should be thick, uniform, and richly studded with the signature Ghirardelli chocolate chips and chunks. This careful process ensures the development of soft, chewy cookies with optimal texture and flavor, ready for the next stage of baking.
Key Baking Considerations
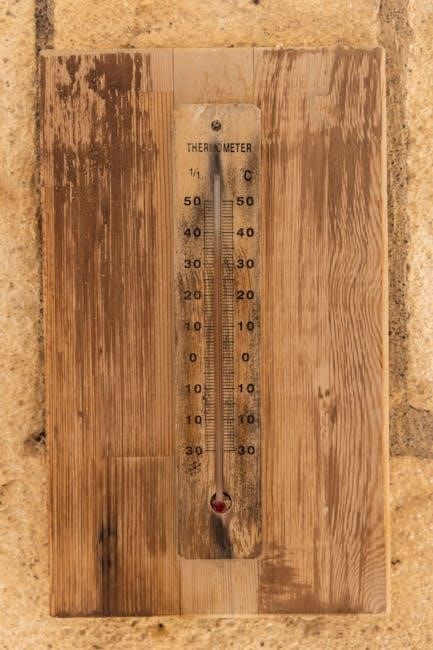
For perfect Ghirardelli Triple Chocolate Cookies, precise baking is key. Ensure your oven is accurately pre-heated to the temperature specified on the mix package; An oven thermometer is highly recommended, as internal oven temperatures often vary from the dial setting, leading to inconsistent results. Insufficient pre-heating or an inaccurate oven temperature can result in cookies that are “super dense, dry and pale,” or, conversely, become over-done with “too much brown on the edges.”
Once dough is portioned and placed on baking sheets, slide them into the fully pre-heated oven. Follow the recommended baking time on the Ghirardelli mix, but always trust your visual cues for doneness. Cookies are typically done when their edges appear lightly golden and the centers look set but remain slightly soft. Removing them at this precise moment helps maintain that desirable soft, chewy texture. Over-baking, even by a brief duration, quickly leads to dry, hard cookies. Allow them to cool on the baking sheet for a few minutes before transferring to a wire rack to finish cooling completely.

Advanced Tips for Enhanced Flavor and Texture
Unlock richer flavor and superior texture in your Ghirardelli cookies. Simple modifications like instant espresso, warm coffee, melted butter, or an extra egg can significantly elevate your baking. Explore creative toppings for truly decadent results.
Boosting Chocolate with Instant Espresso
To truly elevate the chocolate intensity of your Ghirardelli Triple Chocolate Cookies, incorporating instant espresso is a game-changing technique. This secret ingredient doesn’t impart a coffee flavor; instead, it acts as a flavor enhancer, deepening and enriching the existing chocolate notes. As recommended by experienced bakers, dissolving 2 teaspoons of instant espresso powder in 1/3 cup of warm water before adding it to your cookie mix can yield remarkably superior results. This warm, espresso-infused liquid replaces any water or milk typically called for in the standard mix instructions. The microscopic coffee particles interact with cocoa solids, amplifying their inherent bitterness and complexity, which translates into a more profound, almost bittersweet chocolate profile in your finished cookies. The difference is subtle yet impactful, transforming a good cookie into an exceptionally decadent one, making every bite a more intense chocolate experience. This method is a staple for professional bakers aiming for peak chocolate flavor without introducing foreign tastes, ensuring your Ghirardelli cookies achieve gourmet quality. It’s an easy substitution that yields significant rewards in flavor depth and richness, making your homemade treats unforgettable.
The Role of Warm Coffee Substitution
Substituting warm coffee for the water called for in Ghirardelli Triple Chocolate Cookie mix instructions is a brilliant technique to deepen and enrich the chocolate flavor profile. Much like instant espresso, coffee acts as a natural enhancer, subtly intensifying the cocoa notes without imparting a distinct coffee taste to the final product. When the mix specifies adding water, opting instead for an equal amount of warm, brewed coffee – whether regular or decaffeinated – can genuinely transform the cookies. The warmth helps to bloom the cocoa solids present in the mix, releasing their full aromatic potential and contributing to a more robust and complex chocolate experience. This simple swap is a secret among seasoned bakers for achieving a more sophisticated and less one-dimensional chocolate flavor in various baked goods, including cookies and brownies. The coffee’s natural acidity and bitter compounds react synergistically with the chocolate, bringing out its inherent richness and depth. It’s an effortless adjustment that significantly impacts the overall decadence, making each Ghirardelli cookie taste even more gourmet and intensely chocolatey, a truly indulgent treat for any chocolate enthusiast. This strategic substitution ensures a memorable, deeply satisfying chocolate indulgence.
Achieving Richness with Melted Butter
For an unparalleled richness in your Ghirardelli Triple Chocolate Cookies, a crucial advanced tip is to substitute melted butter for any oil or specified fat in the mix instructions. While many boxed mixes call for vegetable oil, replacing it with an equal amount of good quality melted butter, often around 1/3 cup, elevates the flavor profile significantly. Butter, unlike neutral oils, contains milk solids that caramelize during baking, imparting a depth of nutty, buttery flavor that complements the chocolate beautifully. This simple swap doesn’t just add flavor; it also contributes to a superior texture. Cookies made with melted butter often boast a chewier, more tender crumb and a more luxurious mouthfeel, moving them closer to a from-scratch gourmet experience. The fat content in butter helps create a softer, more pliable dough, which can result in cookies that are perfectly crisp at the edges and wonderfully soft in the center. Embracing melted butter is a straightforward yet highly effective method to transform your Ghirardelli mix into an even more decadent and satisfying treat, ensuring every bite is infused with a rich, full-bodied indulgence.
Adding an Extra Egg for Chewiness
For those seeking an undeniably chewier Ghirardelli Triple Chocolate Cookie, a highly recommended advanced tip is to incorporate an extra egg into the mix. This simple yet transformative addition is a popular hack among baking enthusiasts, often shared in online forums like r/Cooking, as it significantly enhances the texture of boxed cookies. Eggs contribute essential moisture and richness to baked goods, and by adding an additional one beyond the standard recipe, you introduce more protein and fat into the dough. This extra protein from the egg whites helps to create a more structured yet still pliable cookie, which is key to developing that desirable chewy quality rather than a crumbly or cake-like texture. Furthermore, the added fat from the extra egg yolk contributes to a richer, more tender crumb, ensuring the cookies remain moist and resist becoming dry or brittle. This adjustment guarantees your Ghirardelli cookies will have that coveted soft center and a satisfyingly chewy bite, elevating them to a truly gourmet standard with a delightful mouthfeel.
Incorporating More Chocolate Varieties
To truly elevate the Ghirardelli Triple Chocolate Cookie experience, consider incorporating even more diverse chocolate varieties beyond what the mix already provides. While the base mix undoubtedly delivers a rich foundation, supplementing it with additional Ghirardelli chocolate chips or chunks can intensify the flavor and introduce delightful new textures. For instance, stirring in an extra half-cup of Ghirardelli Dark Chocolate Chips will deepen the overall richness, creating a more sophisticated, intense cocoa profile that appeals to connoisseurs. Alternatively, for those who appreciate a creamy sweetness, a handful of Ghirardelli Milk Chocolate Chips can provide a wonderful balance to the existing darker notes. Don’t overlook the impact of different forms; adding larger Ghirardelli chocolate chunks will create luscious, molten pockets of chocolate within each cookie, offering a satisfying contrast to the smaller chips. Even a small quantity of white chocolate chips can introduce a sweet, distinct counterpoint and visual appeal. This thoughtful layering of various chocolate types, echoing the craftsmanship found in Ghirardelli’s other premium baking products, ensures every bite is a complex symphony of cocoa flavors, making your homemade cookies truly extraordinary and unforgettable for any chocolate lover.
Creative Toppings: Peanut Butter Drizzle
For an exciting twist on your Ghirardelli Triple Chocolate Cookies, consider a creative topping that adds both visual appeal and a delightful flavor contrast: a melted peanut butter drizzle. This simple addition can transform an already decadent cookie into an even more gourmet treat. To prepare, gently melt about a quarter cup of your favorite creamy peanut butter until it’s smooth and pourable. You can achieve this in a microwave in short bursts, stirring frequently, or in a small saucepan over low heat. Once melted, carefully drizzle the warm peanut butter over the cookie dough before baking. For a beautiful marbled effect, as suggested by online enthusiasts, you can gently drag a skewer or a toothpick through the drizzled peanut butter, creating elegant swirls on the surface of each cookie. This technique not only looks impressive but also ensures that the creamy, nutty flavor of the peanut butter is integrated throughout the cookie. The warmth of the oven will meld the peanut butter with the rich chocolate, creating a harmonious blend of sweet and savory notes that perfectly complements the triple chocolate intensity, offering a unique and irresistible indulgence with every bite.
Gourmet Finishes: Salt, Caramel, and Beyond
Elevate your Ghirardelli Triple Chocolate Cookies to a truly gourmet experience with sophisticated finishes. A simple sprinkle of flaky sea salt, applied immediately after baking while the cookies are still warm, can profoundly enhance the chocolate’s depth, creating that coveted sweet and salty contrast. The coarse texture of the salt crystals also adds an appealing visual and textural element. For an indulgent caramel touch, consider drizzling warm, store-bought caramel sauce over the cooled cookies, or even pressing small caramel bits into the dough before baking for a chewy surprise. Beyond salt and caramel, the possibilities are extensive. A dusting of high-quality cocoa powder or powdered sugar can add elegance. For an extra layer of chocolate complexity, melt some white chocolate or milk chocolate and create artistic drizzles. Toasted chopped nuts like pecans or walnuts sprinkled on top before baking offer a delightful crunch and nutty flavor. These simple additions transform a delicious mix cookie into a bakery-worthy masterpiece, perfect for special occasions or simply to treat yourself to an elevated dessert.

Troubleshooting Common Cookie Baking Issues
Encountering dense, dry, or pale cookies? Issues often stem from inaccurate flour measurement, potentially adding too much. Additionally, verify your oven temperature with a thermometer and ensure adequate pre-heating. Over-baking can also lead to overly brown edges.
Diagnosing Dry or Pale Cookies
When your Ghirardelli Triple Chocolate Cookies emerge from the oven looking disappointingly dry, dense, or pale, it’s a clear sign that something in the baking process needs attention. One of the most frequent culprits for a dry and dense texture is an inaccurate measurement of flour. If you inadvertently add too much flour, the dough will absorb excess moisture, resulting in a crumbly, less tender cookie rather than the desired chewy interior. This often happens if flour is scooped directly from the bag without properly aerating it or using a kitchen scale.
Another significant factor contributing to both dryness and paleness is related to oven conditions. Cookies that are pale might indicate an oven that isn’t hot enough or hasn’t been adequately pre-heated. A true-to-temperature oven is crucial for proper browning and texture development. Conversely, if your cookies appear dry with excessively dark or “over-done” edges, it suggests the oven might be running too hot, or the baking time was extended beyond what was necessary. An oven thermometer can be an invaluable tool to confirm your appliance’s actual internal temperature, ensuring it matches the recipe’s requirement. Understanding these common pitfalls allows for precise adjustments, leading to perfectly baked, moist, and visually appealing Ghirardelli cookies every time.
The Importance of Accurate Flour Measurement

Accurate flour measurement is a cornerstone of successful baking, especially when working with a Ghirardelli Triple Chocolate Cookie Mix. An incorrect amount of flour is a primary reason why cookies can turn out dense, dry, and lack the desired chewy texture. If too much flour is incorporated into the mix, it will absorb an excessive amount of moisture, leaving the cookies crumbly and stiff rather than soft and rich. This common error can significantly alter the delicate balance of ingredients intended to create a perfectly moist and flavorful cookie.
Many home bakers unknowingly add too much flour by scooping it directly from the bag with their measuring cup. This method compacts the flour, leading to a volume that is much greater than what is actually needed. The best practice for accurate measurement involves spooning the flour lightly into the measuring cup until it overflows, then leveling it off with a straight edge, such as the back of a knife. Alternatively, for the most precise results, using a digital kitchen scale to measure flour by weight is highly recommended. Understanding and implementing these precise measuring techniques ensures your Ghirardelli cookies achieve their intended soft, chewy, and intensely chocolatey perfection, avoiding the pitfalls of a dry and unappetizing batch.

Ensuring Correct Oven Temperature and Pre-heating
Achieving perfectly baked Ghirardelli Triple Chocolate Cookies hinges significantly on ensuring the correct oven temperature and adequate pre-heating. Many baking issues, such as cookies appearing over-done with too much brown on the edges, or conversely, being pale and undercooked, stem from an inaccurate oven environment. It is crucial not to solely rely on your oven’s built-in thermostat, as these can often be off by a significant margin.
Investing in an inexpensive oven thermometer is a simple yet powerful step to troubleshoot and prevent common baking woes. This tool allows you to verify the actual temperature inside your oven, ensuring it matches the recipe’s requirement. Furthermore, proper pre-heating is non-negotiable. Placing cookie dough into an oven that hasn’t reached its target temperature and stabilized means the cookies will begin baking in a gradually heating environment. This extended, slow exposure can cause them to spread excessively, dry out, or bake unevenly, preventing that desired chewy center and crisp edge. Always allow your oven to fully pre-heat for at least 15-20 minutes after it signals it’s ready, confirming with your thermometer, for consistent, delicious Ghirardelli cookie results.

Exploring Mix Variations and Purchase Options
Find Ghirardelli Triple Chocolate Cookie Mix and other varieties, like Dark Chocolate Chip, at major retailers such as Costco, Sam’s Club, and Amazon. You can even adapt Ghirardelli brownie mix to create delicious, chewy cookies.
Making Cookies from Ghirardelli Brownie Mix
Transforming a Ghirardelli brownie mix into delicious cookies offers a fantastic textural variation. This technique yields chewy chocolate cookies with soft centers and crisp edges, providing a delightful twist on traditional brownies. Professional bakers often praise the consistent quality of Ghirardelli brownie mixes, establishing them as an excellent foundation for this versatile adaptation. It’s a smart way to enjoy the rich Ghirardelli chocolate flavor in a different form, making it a favorite for quick, satisfying treats.
To convert a typical 20 oz box of Ghirardelli brownie mix, combine the dry mix with two large eggs and 1/3 cup of oil (like avocado, canola, or vegetable). Note that Ghirardelli’s dark chocolate brownie mixes may require more oil than other varieties, so consulting the original brownie instructions is wise for precise measurement. Enhance the chocolate experience by stirring in an additional cup of chocolate chips or chunks. After mixing, simply drop spoonfuls onto a baking sheet and bake as you would standard cookies. This innovative approach delivers homemade-tasting cookies with minimal effort.
Where to Buy Ghirardelli Triple Chocolate Mix
Locating the delectable Ghirardelli Triple Chocolate Cookie Mix is often a straightforward endeavor, as it’s a popular item stocked by numerous retailers. Many enthusiastic bakers report finding large boxes, sometimes containing multiple bags, at prominent warehouse clubs like Costco and Sam’s Club. These bulk purchases can be quite economical, with anecdotal evidence suggesting prices around 10 Canadian dollars for a multi-pack, making it a great value for frequent baking or preparing a large batch of irresistible cookies.
Beyond wholesale clubs, the mix is also readily available through expansive online marketplaces, such as Amazon.com, where you can often find the practical 17.5-ounce, 3-pack option. This offers unparalleled convenience for those who prefer to shop from the comfort of their own home. Additionally, always check the well-stocked baking aisle of your local major grocery stores, as Ghirardelli products are very widely distributed. While specific availability can naturally vary by region and individual store, a quick search online or a visit to these common outlets should confidently lead you to this fantastic mix, ready to transform your baking experience.